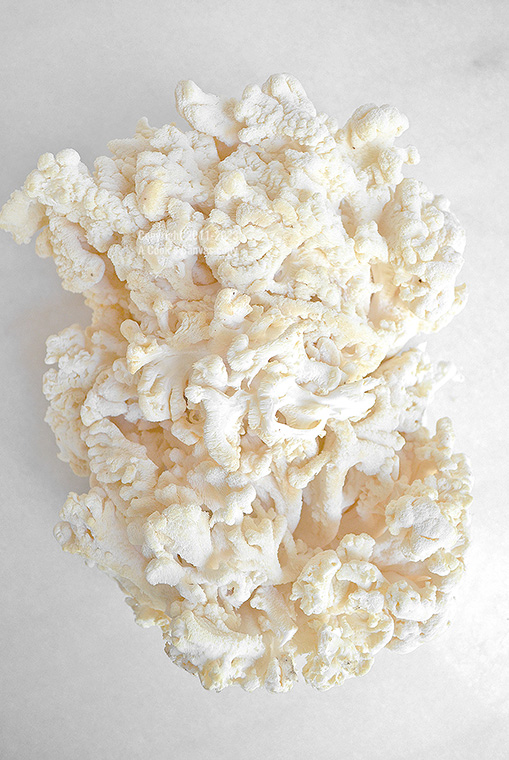
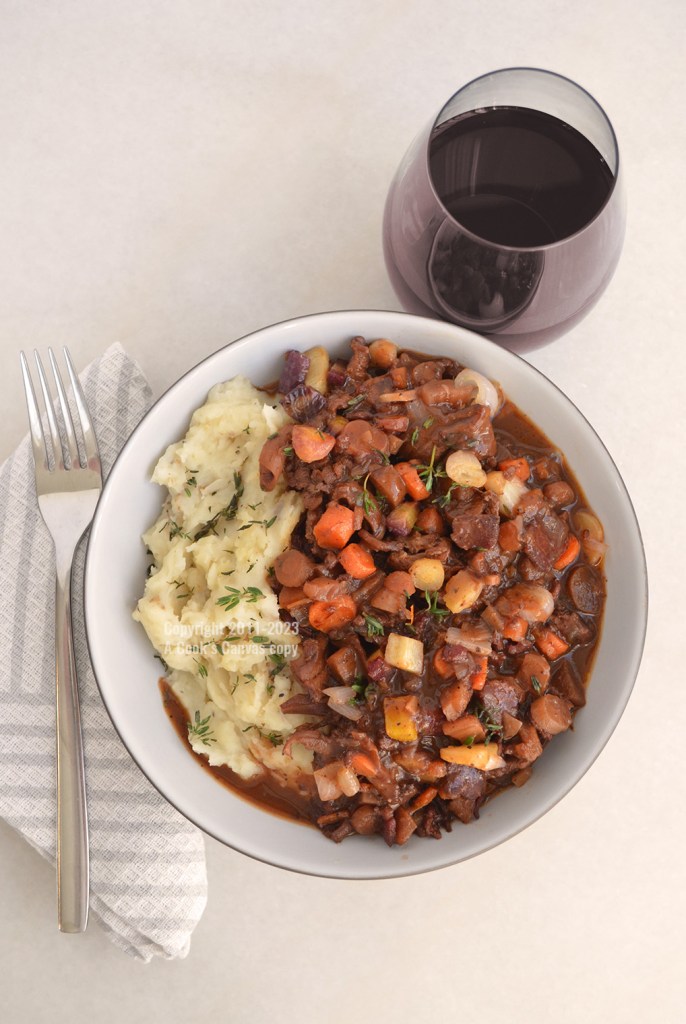
Lion’s mane mushrooms have a dense, meaty texture similar to stewed beef and easily take on the flavors of this recipe; the result is familiar in its decadence but avoids the heaviness that often follows consuming red meat. Smoked bacon and beef broth provide ample meaty flavors while enriching the silky herbed sauce of aromatic vegetables and red wine. This dish is neither vegan or vegetarian but rather Fungitarian.
Ingredients 2 lbs lion’s mane mushroom, cut into 1″ pieces 4 T. avocado oil or other high-heat oil for browning the lion’s mane 4 T. unsalted butter 2 T. all-purpose flour 12 oz. thick-cut smoked bacon or lardons, diced 6 medium carrots, sliced 1 large red or sweet onion, diced OR 1lb. pearl onions, blanched and skins removed 5 large cloves roasted garlic, thinly sliced 2 bay leafs Small bunch of fresh parsley 8 sprigs of fresh thyme 3 C. medium-bodied red wine, (Burgundy or Bordeaux works well) 2 C. beef broth, Better Than Bouillon works well 1 T. tomato paste Sea salt and freshly ground pepper to taste
Directions Clean the lion’s mane with a mushroom brush before chopping it into pieces; we’re going for a stew meat texture, so irregular chunks and torn edges work well here. Heat two 2 tablespoons of oil in a large pan over medium heat and brown the mushroom in batches until they are lightly browned on all sides. Set aside on a plate. In the same pan, fry the bacon or lardons until crisp. Remove the bacon to a bowl and sauté the onions and carrots until translucent, 5-6 minutes. Add the garlic and cook for another two minutes before returning the mushrooms and bacon to the pan. Sprinkle with 2T flour and cook for 5 minutes to remove the raw flour taste; while that is cooking, tie the fresh herbs and bay leaves into a bouquet garni and add it to the pan along with the wine and broth, simmer for 30 minutes. Remove and discard the spent herbs; the lion’s mane can absorb a lot of liquid, so add water as necessary to reconstitute the sauce before seasoning to taste with sea salt and black pepper. Serve with creamy mashed potatoes or sliced warm baguette.
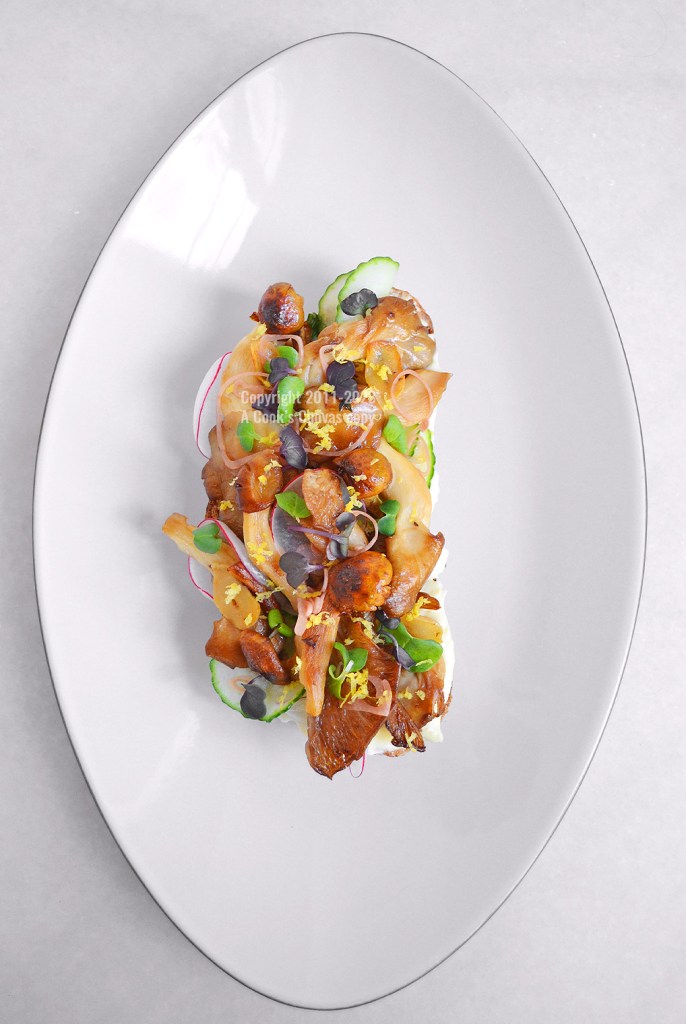
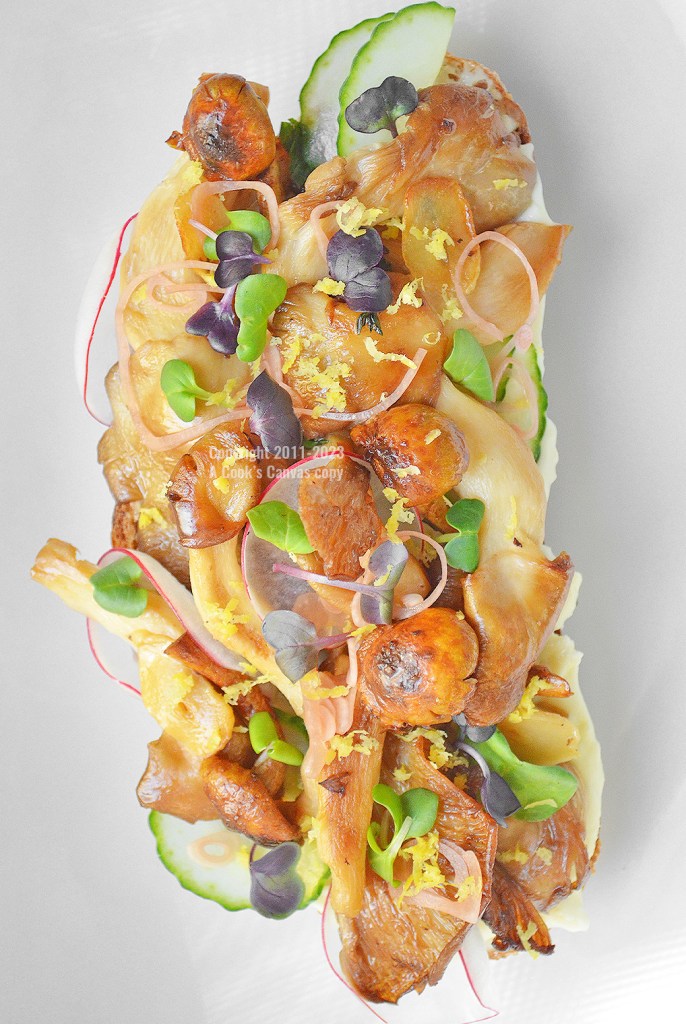
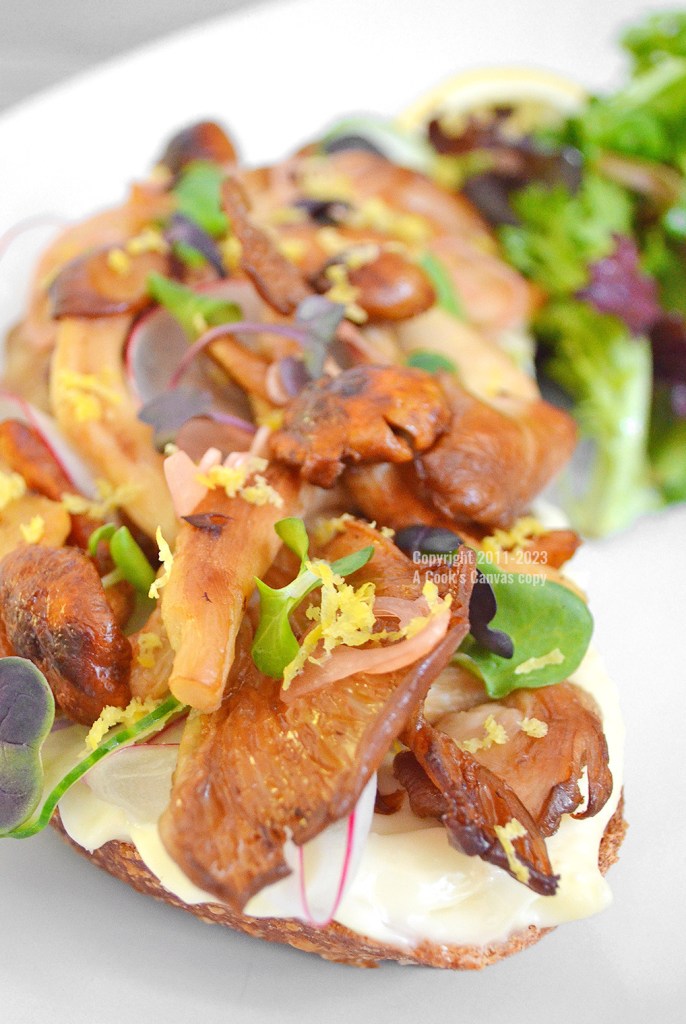
Tartine is the French term for “open-face sandwich,” basically what we call ‘toast’ here in America. Europeans enjoy tartines for breakfast, lunch, and dinner, with many options for creating delicious and intriguing combinations; this flexibility inspired my first recipe with Windy City Mushrooms, an elm oyster and chestnut mushroom tartine with Brie and pickled vegetables.
This simple recipe with sautéed fresh mushrooms makes a perfect light meal, or cut it in thirds to make crowd-pleasing appetizers to impress your guests during the holidays.
Elm Oyster Mushrooms
The Elm Oysters have a mild nutty flavor and a delicate aroma. When cooked, they develop a meaty texture making them a good substitute for meat in vegetarian and vegan recipes. These mushrooms are not only delicious, but they provide a low-fat source of protein, as well as possessing anti-tumor, anti-inflammatory, and anti-fungal properties. Fresh Elm Oysters only last about 48 hrs at room temperature but will last up to 7 days when stored in a paper bag in the refrigerator.
Chestnut Mushrooms
Chestnut mushrooms taste like a mild Shiitake with a distinct nutty umami flavor, earthy with a slightly peppery finish. They have a somewhat unique ability to retain their plump, snappy texture after cooking, which makes them very satisfying in a dish, not unlike fresh asparagus. They are also very nutritious and a great source of vitamin B3/B5; they also have anti-tumor, anti-inflammatory, and anti-fungal properties.
Freshly harvested Chestnut Mushrooms will last up to 7 days when stored in a paper bag in the refrigerator.
English Cucumber, thinly sliced (mandoline recommended)
Triple-Cream Brie (I recommend Fromager d’Affinois which is available in better grocery stores
1 lemon, zested
Fresh parsley, chopped
4 sprigs fresh thyme
1-1/2 C. red wine vinegar
1 T. Sugar
4 T. Salted butter
3 T. Olive oil
Freshly ground black pepper
Microgreens, for garnish (I used Rainbow Radish)
Directions
Preheat oven to 400’F
Slice the bread and brush both sides with olive oil. Bake at 400’F on the middle rack for 5 minutes on one side and 2-3 minutes on the other.
While the bread is baking, thinly slice the shallots and add the vinegar, along with the sugar. It’s best to make this the day before to allow them to pickle overnight.
Thinly slice the radishes and cucumber and add them (separately) to two ice water baths. This will keep both the radishes and cucumbers crisp.
Zest the lemon, making sure only to get the yellow layer avoiding the bitter white part.
Heat a sauté pan on medium heat, and add 2 T of salted butter. Once the butter starts to foam, add the elm oysters and 2 sprigs of fresh thyme. Sauté on medium for 6 minutes while occasionally stirring. Once the oyster mushrooms are cooked, repeat with the chestnut mushrooms/fresh thyme and the remaining 2 T of salted butter. When both mushrooms are cooked, add all the mushrooms back to the pan (with the thyme) and the freshly chopped flat-leaf parsley. Cook for 2 minutes. Set aside.
Plate one piece of sourdough bread, add a generous spread of triple-cream brie and then add slices of cucumber and radish to the sandwich. Next, top with a big spoon of mushrooms and tuck in a few more cucumber and radish slices. Top with pickled shallots and a sprinkle of lemon zest and freshly cracked black pepper.
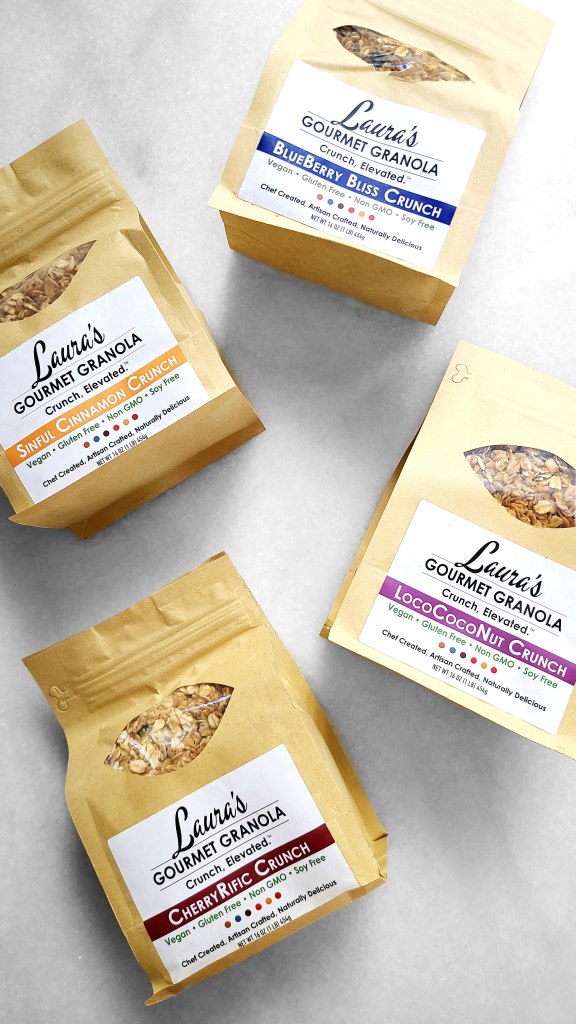
What led you to create Laura’s Gourmet Granola? What became Vanilla Almond Crunch, which is our flagship and our first flavor, became nothing more than me making granola for myself. It stemmed from seeing a recipe in a magazine that looked like what I would eat in college while taking exams. I was pretty much fresh out of culinary school, I had been out for a year at that point, and I saw this recipe and made it. I thought, well this is good except it had butter in it and I don’t good with butter, and it had white sugar and I’m not a big fan of white sugar. So, for whatever reason, I kept playing with the recipe, documenting it as I went. I was trying different oils, sugars, and then one day I made a batch that was the recipe. Along the way, every time you make food or bake especially, you have more than you want so you start giving it away to people. So, people started asking me for it. When I hit the number with Vanilla Almond Crunch, it just kept growing a little more each time.
At this point, my best friend said I should think about selling it, I wasn’t busy with my first business as of yet, and so I started reaching out to AJ’s Fine Foods which is like your Treasure Island kind of a store. I ran into the owner of the entire chain one day outside the market, and he said he would put in a word for me, and that’s how we started with the shelf. It was ever only supposed to be something I enjoyed eating during exams in college and it was after that I realized, maybe I was meant to be Granola Girl.
So, we get on the shelf, and Steve Lafieber – who is still our category manager, said “You know Laura, in our industry one SKU is good but two SKU’s are better.” It was during that time, almost fall so I decided to make Pumpkin Pecan Crunch with spice blends and nuts, and not too much of a difference with the platform overall.
The packaging wasn’t the best, it was in a crafted-tied bag with handprinted labels from my inkjet at home, no barcode, no nutrition label, and AJ’s Finer Foods was okay with that because they are a family-owned chain. It was when we got into Whole Foods that we had to start providing a little more information. While all this was going on I was still focusing all my time on Chef Laura for Celebrating Cuisine Catering, and Laura’s Gourmet Cuisine was the little kid sister nuisance, it kept needing attention, and I was like “I’m a chef, I’m not a granola maker” I didn’t know marketing, I mean I did store sampling but nothing tremendous.
I have a friend who would pick all the almonds out of the bag, which made me crazy. He said, “Well, I don’t like almonds”. I said “Well, I see you eat peanuts?” He said “I know, I love peanuts.” So, I created Honey Roasted Peanut Granola so I didn’t have to watch him remove the almonds.
Meanwhile, I would buy granolas from Whole Foods, and as I’m eating it I thought “these apples are really good, I wonder where they came from?”. So, I contacted the company and asked where the apples come from, so they told me, and I reached out to that company, so then Applelicious. So, everything kept evolving in terms of the flavor development, to me, it was more important to have individual flavors that appealed to an individual’s palette as pose to putting everything into the bag. Like every nut, every seed, every fruit, which at the end of the day becomes trail mix.
It wasn’t until 2019 that I made a conscious choice between Celebrated Cuisine and Laura’s Gourmet Granola. There’s a metaphor that I go by and it is “You need to listen to the universe when it’s talking to you. It will tap you on the shoulder, and you ignore it.” I was getting these signs that I should focus on Laura’s Gourmet Granola and I was ignoring them all. I was still juggling small dinner events out of my house after closing my catering business but it took time away from granola. Then, the pandemic hit, and there were no more events to be had. So, it was like the universe was saying “Are you listening to me now?” It was good and bad because it was March of 2020 and over 60% of our business was food service and it’s gone – overnight. At the same time in 2019, we started expanding retail so we are in Texas, Chicago, upper Midwest States, so that helped us stay afloat. Honestly though, if it wasn’t for PPP’s it would be hard to stay afloat. That really, really made the difference.
Now that things have opened back up, it’s like we went through a discovery because our retail is up but our food service is up more than it was before. Since the pandemic experience, it seems like so many restaurants have popped up that are more geared to “Grab-n-GO”, and we are a good fit for that.
After Vanilla Almond Crunch, what was the next flavor you created? Pumpkin Pecan was our next flavor but now we have placed that flavor into our seasonal. Then Honey Roasted Peanut followed. These are our only ‘nut-based’ and non-agave-based granola. So, if you’re a strict vegan, we have vegan flavors. Then from there, it was Applelicious – which my daughter helped me named, then LocoCocoNut, and we have a limited-edition flavor called Dark Chocolate Crunch which is also seasonal and will be back in October.
Who do you see as your ideal customer on retail? That’s a great question! The ideal customer for Laura’s Gourmet Granola is someone who understands everything we eat is about balance. Meaning, that you need to take into consideration taste, texture, while you’re looking at the nutritional benefits of something. Because, if you are just trying to eat “healthy”, and only that, your food is probably not going to be all that awesome unless you just love fruit and vegetables.
Also, my ideal consumer would be one who doesn’t compromise. Because you can have all three at one time (taste, texture, and nutrition). I totally support our nutrition label. I know there is sugar in our product but you eat our product in moderation. And someone who will take our product, and use it throughout the day, creatively.
Bottom line, my ideal customer is someone who understands the balance and doesn’t compromise.
What is your favorite dishes to incorporate your granola? One of my favorite dishes is roasted acorn squash and sweet potato soup which is vegan. I use vegetable stock, coconut milk to finish it and give it texture and creaminess. It has Thai chili in it. You want sweet, spicy, salty, and sour in your dish. So, when I finish the soup, I top it with Thai chilies and our pumpkin pecan crunch.
Another favorite dish is my foodie chopped salad which is my all-time favorite salad! It is a kale-blend, brussel sprouts, roasted sweet potato, roasted pepitas, with a cherry-balsamic reduction. When I’m making the cherry reduction, I’m using the same cherries we include in our Cherryific granola so it infuses, and top with the granola.
Something new I’ve been doing is I’m taking my granola, and grinding it down into a granola flour to bake or cook with. So far, I’ve made snickerdoodle with our SinnfulCinnamon granola, so they are Sinnfuldoodles. They come out so chewy! With our BlueberryBliss, I ground that up and combined it with cashew butter, baking powder, maple syrup, and pureed banana and baked it into a blueberry banana bread. I took our Honey Roasted Peanut and ground that up, combined it with a little cornstarch, and tossed cubes of tofu with it. At that point, you can either fry them on the stovetop or toss them in the air fryer and I add it to my Asian chopped food salad with a miso vinaigrette.
So, remember when I said the chef side was telling the granola girl “go away, I’m not that”, as I have grown into making this my full-time job I have been much better at recognizing that my chef stripes don’t get blurred in the process. I get to still create recipes and dishes using my granola.
Who or what inspires you? First of all, here in Scottsdale Arizona we have some great chefs that run restaurants, and when they tell me what they create from my granola that inspires me. In honesty, “the what” that inspires me is that I love to play in the kitchen and see what is possible. The who would be our fan base along with the chefs that are a part of our fan base as well. Because they make you push yourself outside the box.
The inspiration also comes from when you change how you look at food. In January, I tested out a vegan diet for myself, and as a result in doing that, I had to get creative with what I was making for myself. I discovered ingredients I didn’t know existed just by being in that part of the grocery store. I like to tell people, it’s fun to step outside the box and get into our bag!
What advice would you give someone who is thinking about starting a new business? Don’t! Just kidding!
When I started my first business ‘Celebrated Cuisine’, it wasn’t a leap of faith, I knew that’s what I should be doing. I had the financial means to support me through the “just getting started” part. Then with Laura’s Gourmet Granola, which was funded through my catering business, so it was all under one roof. I started with one chain, and I would buy the ingredients, and make it myself. At this point, I had no payroll, I wasn’t paying myself so it segwayed into it.
If someone is intended on starting their own business they need to make a choice. They need to decide if they want to be a locally focus business, and provide to the state they are in – because the benefits are huge when you’re local. Or, if they really want to be big, they need to figure out how to have funding, right out of the shoot to support the type of Go Big Go Fast that they need.
Bottom line – find a mentor, have a sounding board, don’t take no for an answer, and you have to believe in your product more than anyone else does.
What is next for Laura’s Gourmet Granola? I’m thinking about bringing our Acai granola to market but I’m not sure if I should make that ‘web only’. I’ve also been working with another local-based company that makes nut butter, and so we are trying to bring to market a way we can combine the two products for the outdoors enthusiasts. Then I think, should we make clusters, or should we do a bar. If we decide to do a bar we would outsource it because the equipment cost is too high. I have still decided to stay in the granola frame, and then I think, I should take granola flour and bring that to market?
My last question is one I always ask the person I’m interviewing. Do you have a guilty pleasure; something that you prefer to eat when nobody is looking? I absolutely love making my soft pretzels. When I make them, I have to hold myself back. There’s just something about a soft pretzel with the mustard – I mean, I went to school in Philadelphia, and that’s a thing there. If I’m going to have a guilty pleasure it’s the soft pretzel because it’s everything you’re not supposed to have in terms of carbs.
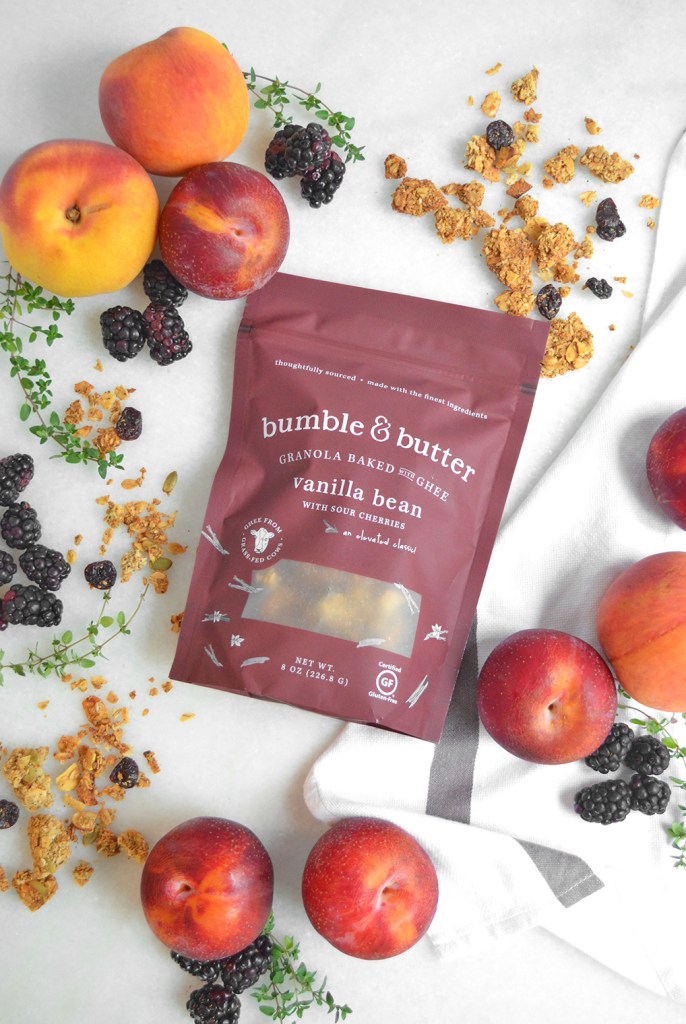
With fall finally upon us its time to enjoy the late-summer harvest of golden peaches, juicy plums, and ripe blackberries. Peppery arugula pairs perfectly with sweet stone fruits and a handful of granola adds crunchy balance to the creamy richness of Greek-style yogurt. To finish, a bright, herbal pinch of fresh thyme brings the garden to your table. This easy to prepare salad makes a perfect breakfast or light lunch, but its bold flavors and contrasting textures also steals the show at the dinner table.
Bumble and Butter was created by Chef Jamie Kim, who has been baking granola for years with small-batch, grass-fed ghee (clarified butter), and honey – using culinary techniques she learned in the restaurant industry. Her granola is available in a range of unique flavors such as Rosemary and Zante Currants, Aged Cheddar with Black Pepper, Sweet Potato with Ginger and Cinnamon, Black Truffle with Honey, and Vanilla Bean with Sour Cherries, which suit both sweet and savory dishes. The excellent quality and flavors won Silver at the 2020 Sofi Award in Cereal & Granola.
For this recipe, I chose Bumble and Butter’s Vanilla Bean with sour cherries granola to serve at brunch, but their range of flavors lends versatility to the recipe. Stay tuned for more dishes featuring Bumble & Butter!
Autumn harvest fruit salad with granola and arugula Serves 6
2 large peaches, thickly sliced 3 large red plums, thickly sliced 1 1/2 cups blackberries 2 tsp. cane sugar 1 T. lemon juice 4 springs of fresh thyme 1 cup 2% greek yogurt 2 cups fresh arugula 1 T. olive oil 1 cup Bumble & Butter Granola 1/2 tsp. freshly cracked black pepper Drizzle of olive oil on top of salad before serving
Slice peaches and plums into a large mixing bowl, squeeze with the juice of half a lemon and toss to coat, then set aside. In a medium bowl, toss arugula together with olive oil and cracked black pepper, and set aside. In a small bowl, toss blackberries with 2 teaspoons of sugar to coat, set aside. On a large platter, spread the greek yogurt then arrange sliced fruit on top. Surround the fruit with small bunches of arugula, then sprinkle with granola, blackberries, and fresh thyme leaves.
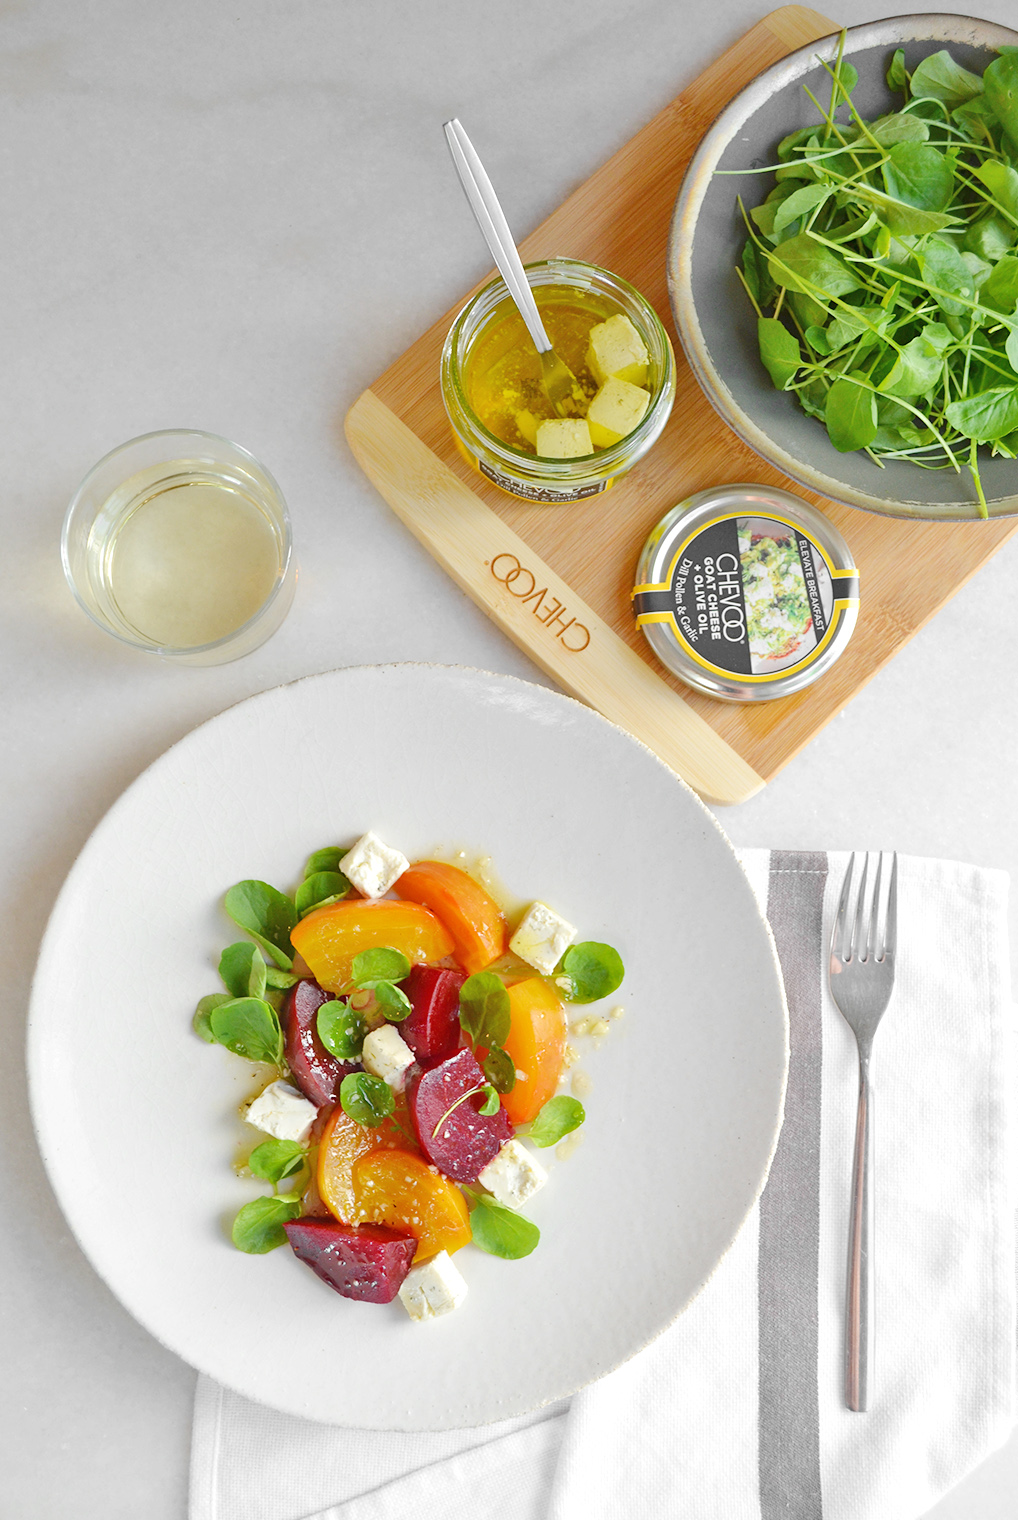
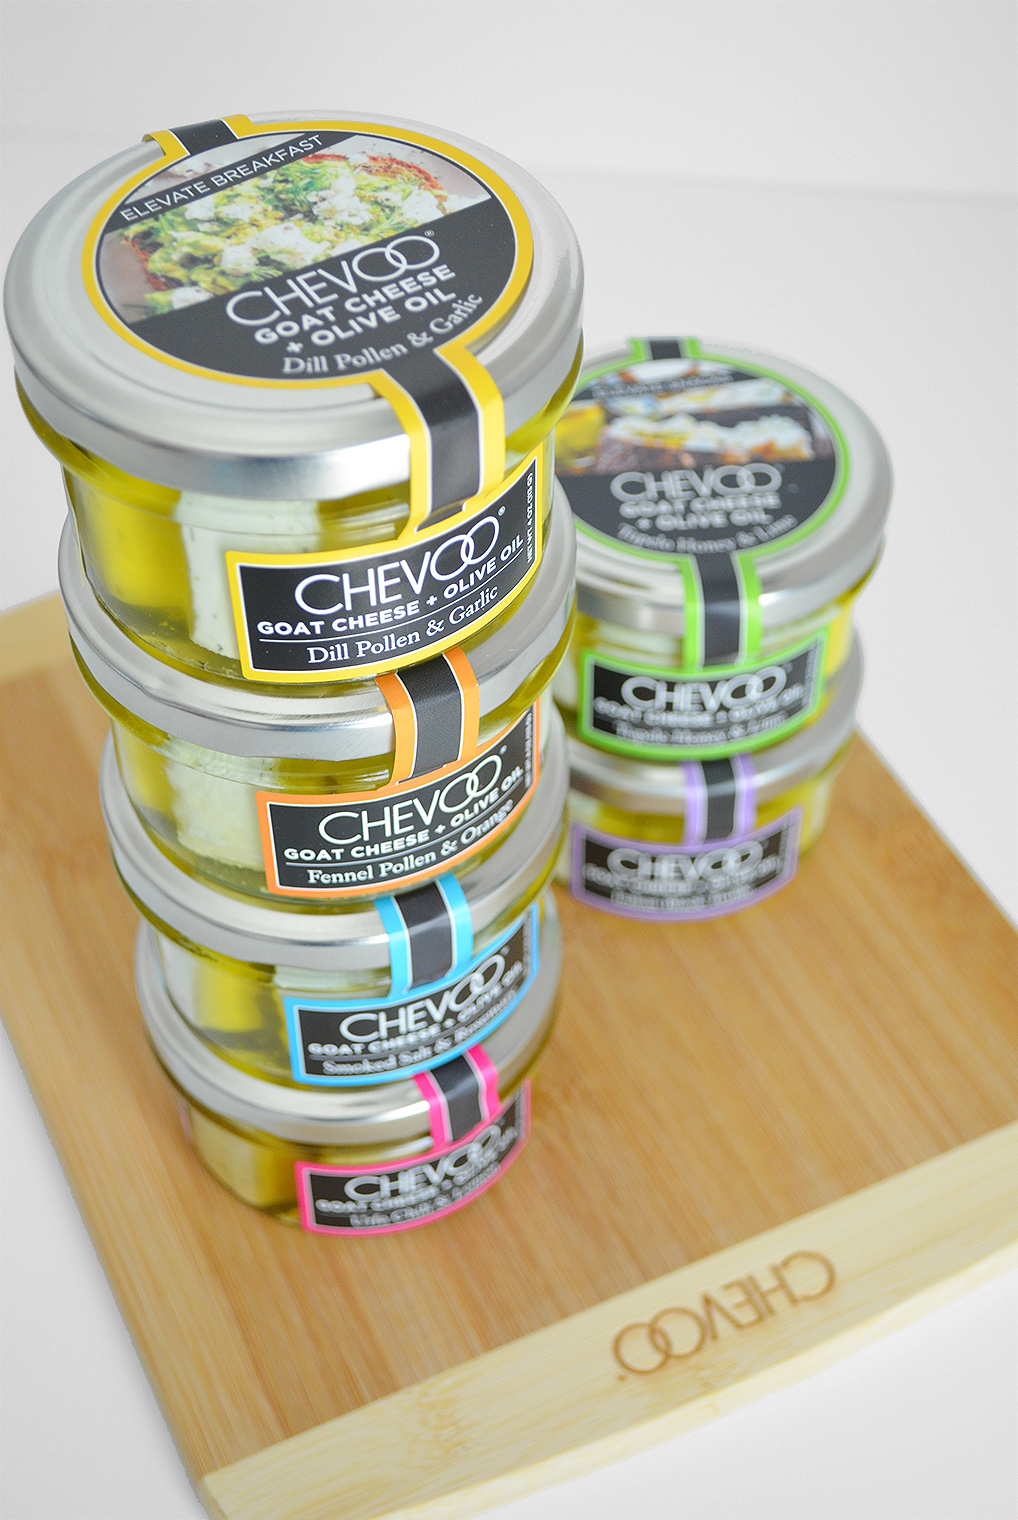
When late summer arrives I start craving the rich flavors of roasted root vegetables. It’s just now mid-August, so while it’s still hot outside I like to combine the earthy-sweet aroma and flavor of roast beets with peppery watercress, tossed with bright, tangy lemon-garlic vinaigrette and topped with creamy cubes of herb-marinated goat cheese. When it comes to choosing a goat cheese, my go-to is CHEVOO for the incredibly delicate texture and bold flavors. This salad is simple to put together and makes an excellent side dish, or add a few slices of crusty baguette for a light but satisfying lunch. Roasting the beets is nearly effortless; scrub the skins and wrap with tin foil like you would a potato, and pop them in the oven for 90 minutes, simple as that.
Roasted Beet Salad with marinated goat cheese and watercress 4 servings
Ingredients 3 red beets 3 golden beets 2 cups watercress 4 oz. fresh goat cheese, cubed; I recommend CHEVOO Dill Pollen and Garlic marinated goat cheese
Preparation Preheat oven to 375’F Prepare the vinaigrette while the oven is preheating. See the recipe below.
To roast the beets Scrub the beets and pat dry. Wrap individually in foil and bake for ~90 minutes or until tender. Remove from oven and unwrap, allowing beets to cool. Under running water, rub skins from beets, being careful to keep the red and gold beets separate to avoid staining. Slice beets into quarters or thinner if desired and arrange on plates, top with a handful of watercress and drizzle with vinaigrette, then add goat cheese just before serving.
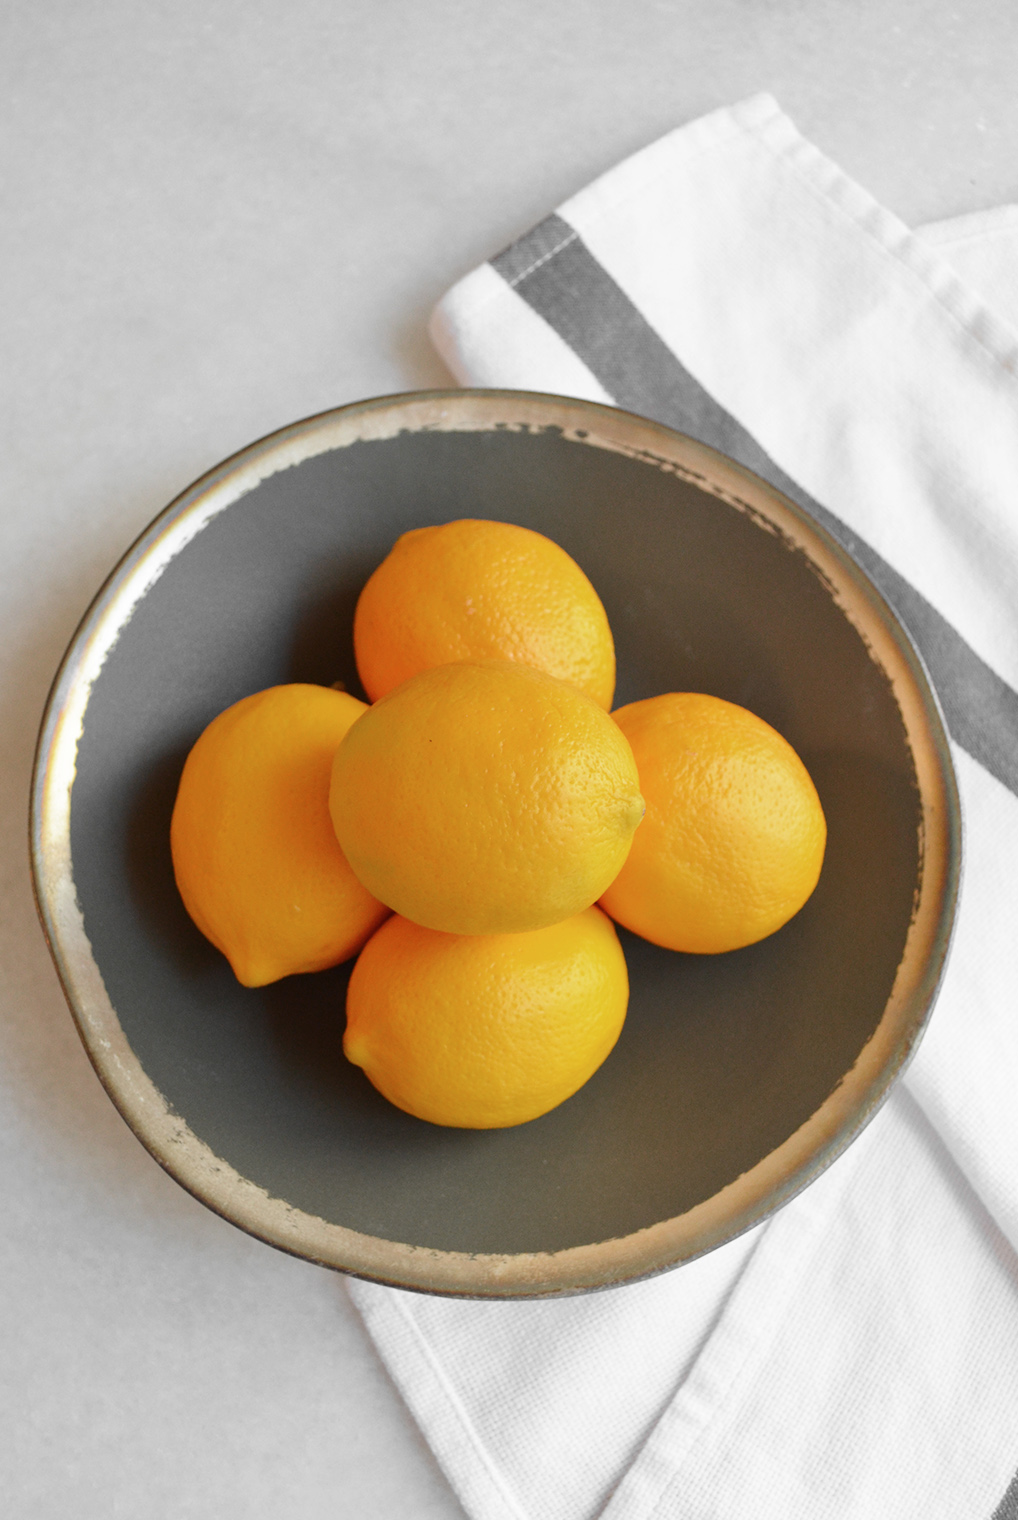
Meyer Lemon and Garlic Vinaigrette
Ingredients 2 T. Olive oil 3 T. White balsamic vinegar 1 T. Honey 1 large/2 small garlic cloves, minced 1 t. Meyer lemon juice 1 t. Sea salt 1 t. Cracked black pepper
Preparation Combine olive oil, vinegar, honey, garlic, and lemon juice. Add salt and pepper to taste. When the beets and watercress are plated, drizzle vinaigrette on top. Serve immediately.
About CHEVOO Aussie-expats Gerard and Susan Tuck brought an Australian staple to the farmlands of Northern California. They have created a unique range to marinated goat cheese such as Dill Pollen and Garlic, Fennel Pollen and Orange, and Black Truffle. For my first recipe featuring CHEVOO, I chose Dill Pollen and Garlic because it pairs incredibly well with roasted roots, lemon, garlic, and watercress. Their marinated goat cheeses are all-natural, non-GMO, gluten-free, contain no sugar, and are low in lactose. Stay tuned for more recipes featuring these delicious, creamy cheeses.
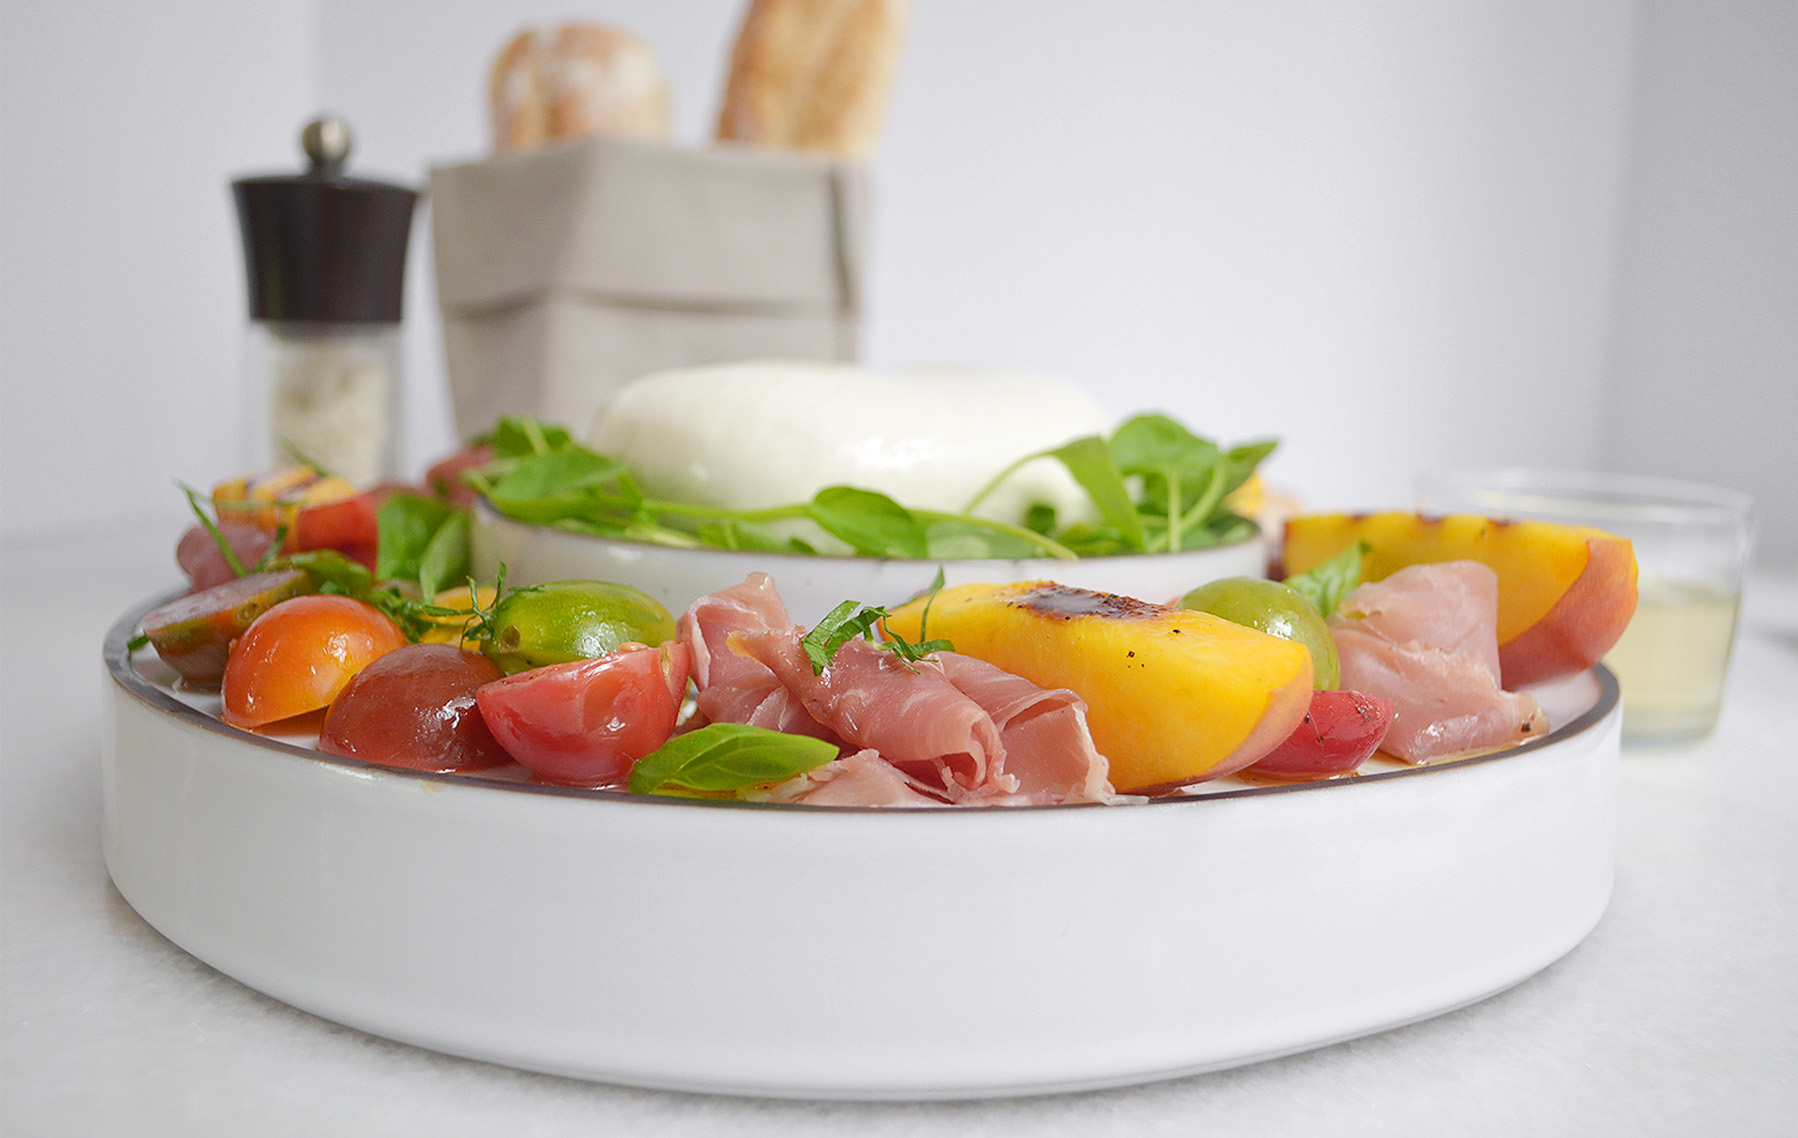
Heirloom tomatoes are one of the quintessential flavors of summer. These sweet cherry heirlooms pair perfectly with another summer classic, juicy peaches, which I’ve grilled and served alongside prosciutto and creamy burrata. This makes a quick and easy side to a larger meal, or as an impressive centerpiece for a casual cheeseboard. Pairs well with a chilled Sauvignon Blanc or white sangria.
Heirloom Grape Tomato Salad with Grilled Peaches, Burrata and Prosciutto
Ingredients
2 peaches, halved
1-pint heirloom cherry tomatoes, halved
1 large burrata
4 oz. prosciutto
1/2 cup fresh basil, torn
White Balsamic Vinaigrette
Ingredients
3 T. White balsamic vinegar
2 T. extra virgin olive oil
Sea salt and black pepper, to taste
Preparation
Preheat your grill to medium-high and brush the grates with vegetable oil. Grill the peaches flesh side down for 3 minutes. Do not move them around or they won’t char. Arrange peach slices on a platter with the tomatoes, burrata, and prosciutto. Sprinkle with fresh basil and set aside. For the vinaigrette, whisk all four ingredients together and drizzle on top of the salad and serve immediately.
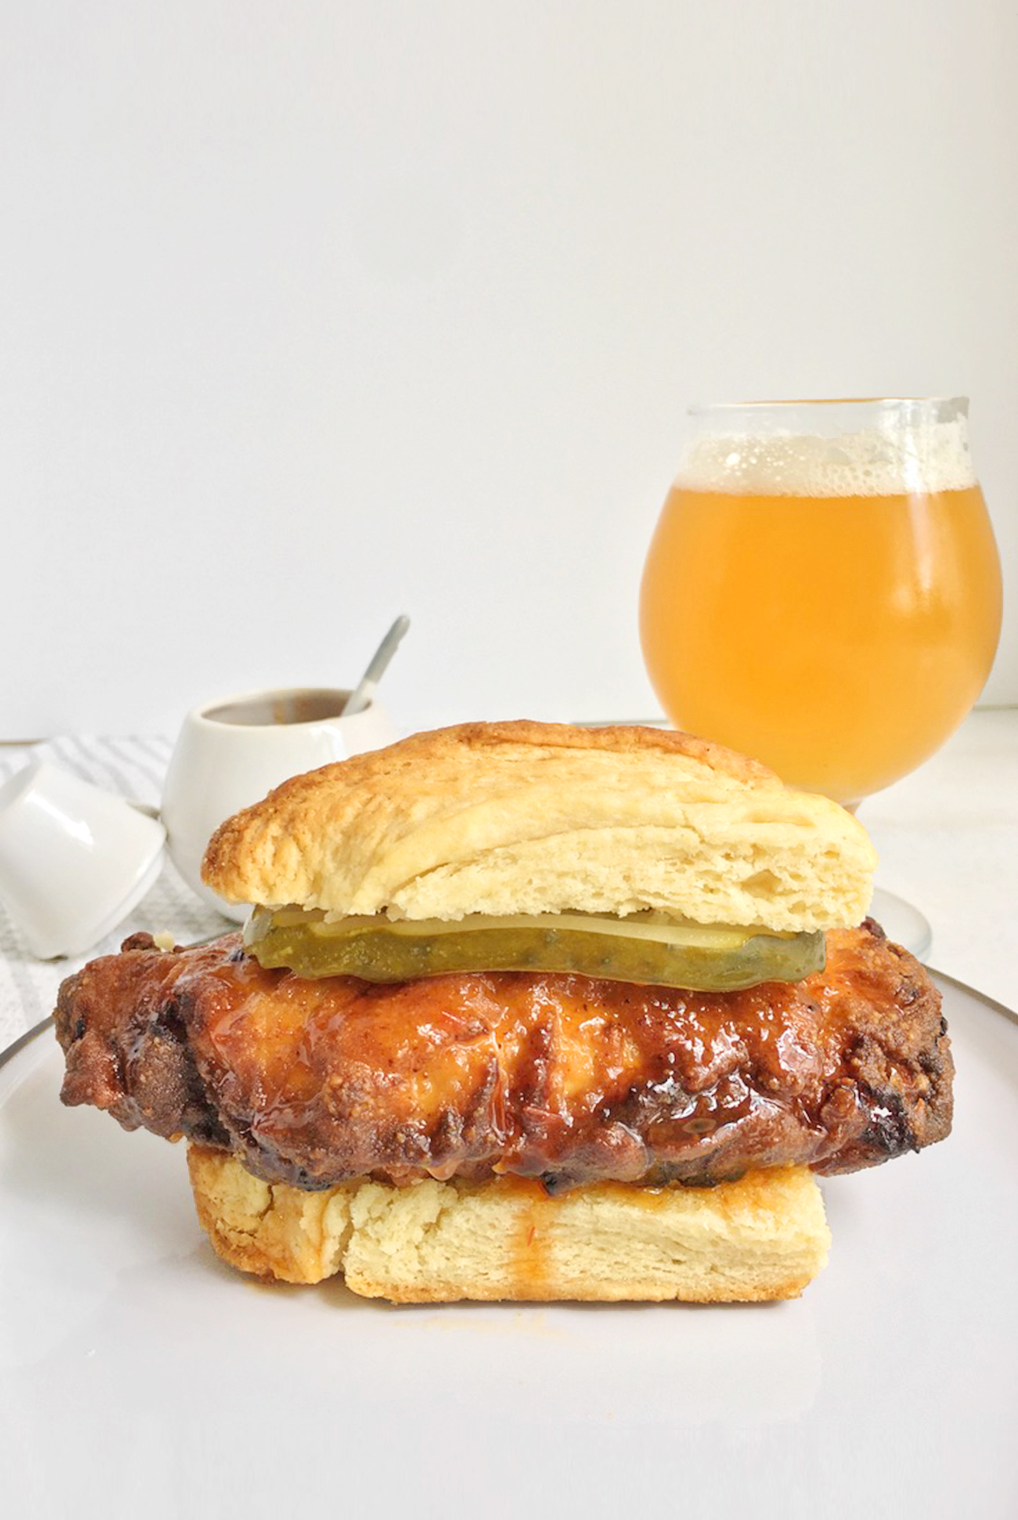
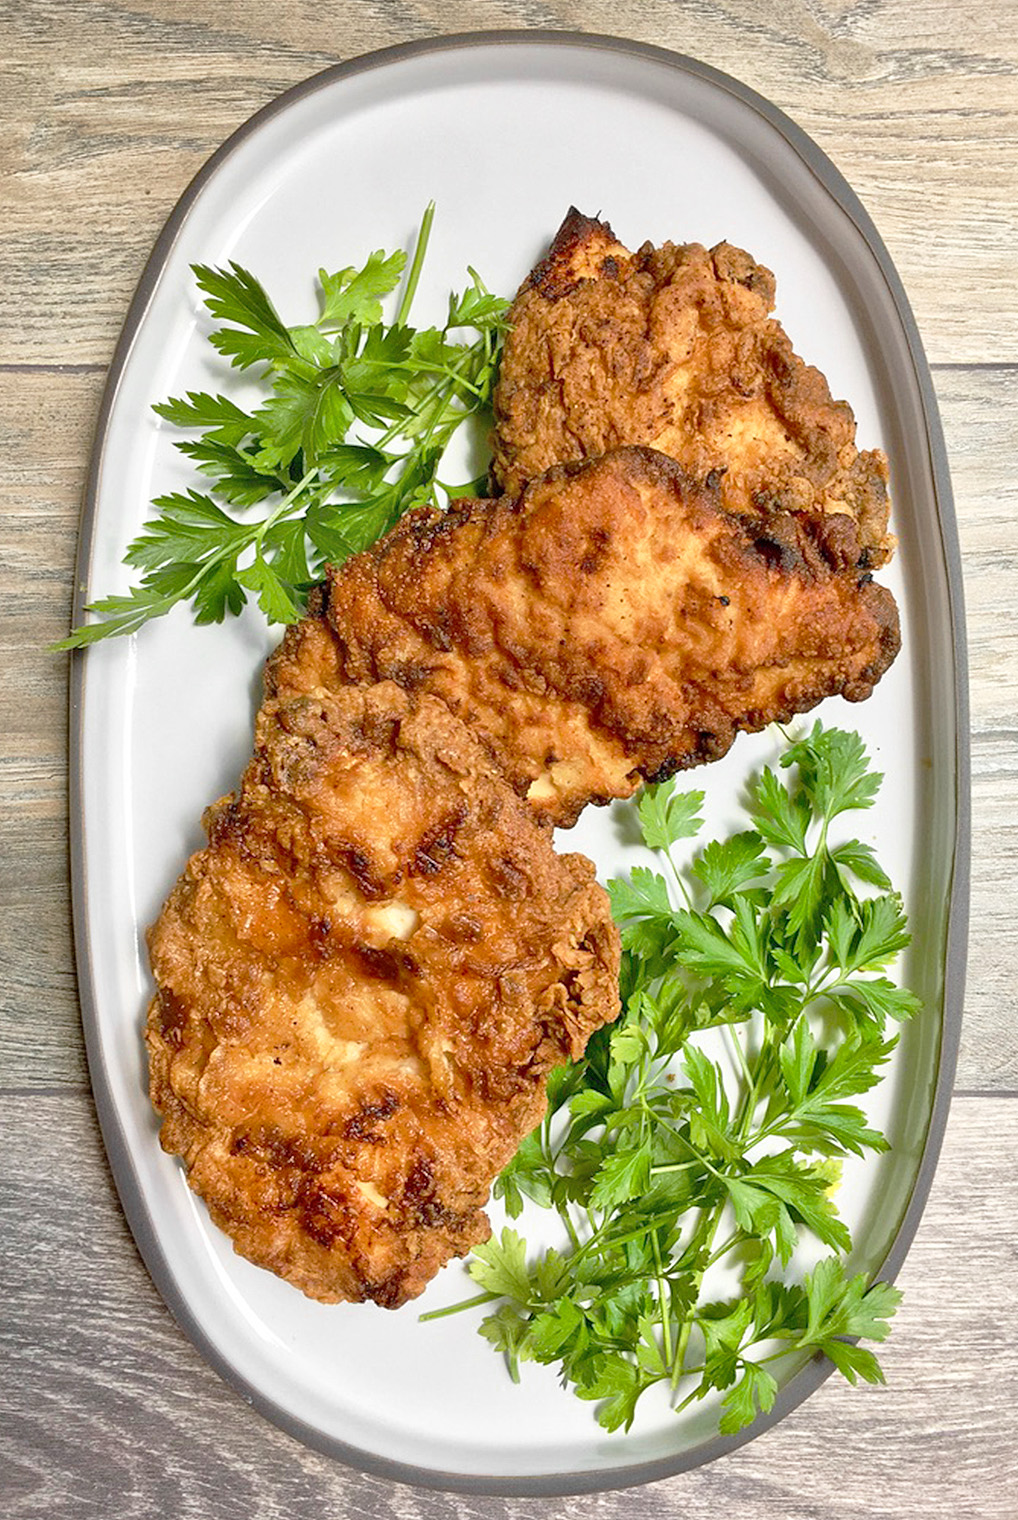
Today is National Fried Chicken Day, though I don’t need a holiday to indulge! I grew up eating homemade fried chicken, my mom and my grandmothers each had their own style but my favorite is marinated in seasoned buttermilk and drizzled with a sweet and spicy honey pepper sauce. This combo works really well on its own, but the spicy honey sauce really shines with a biscuit so today I am making fried chicken on a biscuit! I have a local source for my favorite flavorful Fatalii peppers, but habaneros work just as well.
Fried Chicken Marinade 2 1/2 cups buttermilk
2 T. Onion powder
2 T. Garlic powder
2 T. Paprika
1 T. Sea salt
1 T. Cracked black pepper
2 pounds boneless, skin-on chicken breast or thighs; pound out breasts to about 1/2” (12mm) thick.
Preparation In a shallow dish, stir together the first six ingredients and pour over chicken. Cover and refrigerate for 12 hrs. The longer you marinate the more tender and juice it will be.
Frying the chicken Dredging mixture 5 cups all-purpose flour
2 T. Onion powder
2 T. Garlic powder
2 T. Paprika
1/2 T. Sea salt
1 T. Cracked black pepper
Buttermilk dip Whisk together 1 cup buttermilk and 1 egg.
PreparationPreheat vegetable oil in a cast-iron skillet to 350’F.
In a large bowl combine dredge ingredients and combine, then divide into two separate bowls and set aside. Remove the marinated chicken from the refrigerator and drain each piece before dredging into one bowl, patting to ensure an even coating. Shake off excess, then dip into buttermilk and egg mixture, allow excess to drip off and then dip into the second bowl of seasoned flour. Shake off any excess before slipping into the hot oil. Working in small batches, fry until golden brown and confirm an internal temperature of at least 165’F, about 8 minutes per side. Transfer to a wire rack or paper towel-lined tray to drain excess oil.
Fatalii Honey Sauce *Note – If you can’t find fatalii peppers, habanero also work as they are part of the same pepper family and have a similar flavor. If you would prefer not using fresh peppers in general you can substitute a hot sauce, mix 1 tablespoon into 1 cup of honey. I like Gindo’s Honey Habanero from www.gindos.com
Ingredients 1 cup honey
1 fatalii pepper, seeded and thinly sliced.
Preparation In a glass or ceramic bowl, add the honey and fatalli peppers. Stir thoroughly, muddling the pepper slices with a spoon, then cover and refrigerate several hours or overnight before use.
Buttermilk Biscuits Ingredients 3 Cups All-purpose flour
3 T. Baking powder
1 t. Salt
1 1/2 Sticks plus 2 T. of unsalted butter, cubed
1 1/2 C. Buttermilk
1/3 Cup Bacon fat or shortening
Preparation Preheat oven to 425’F
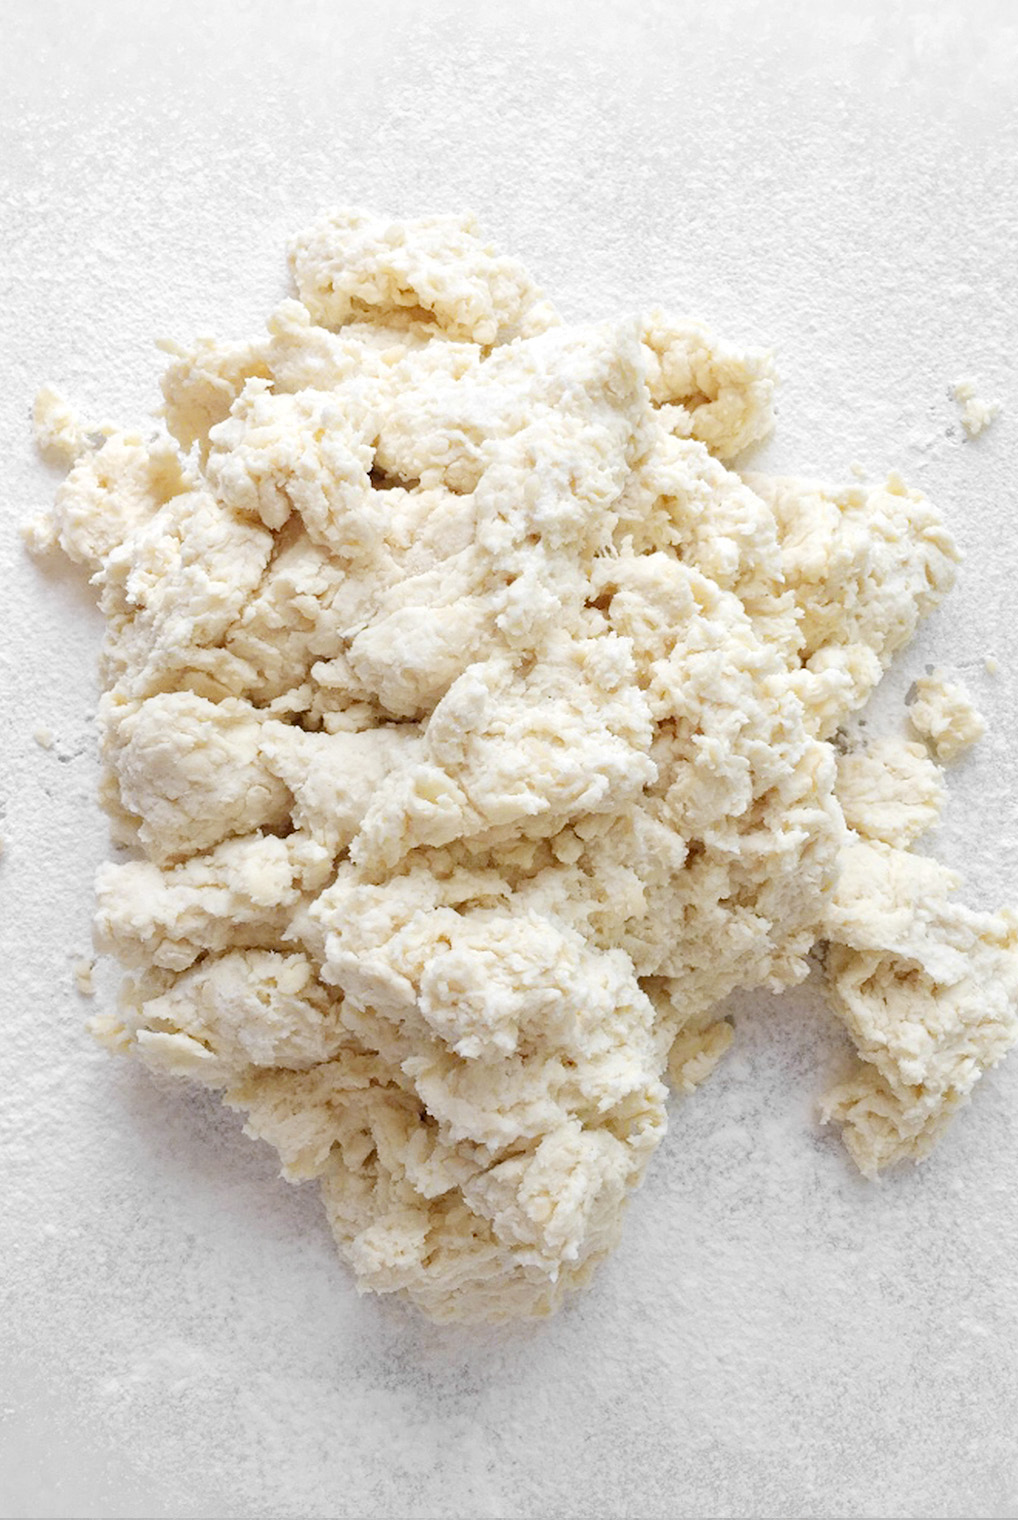
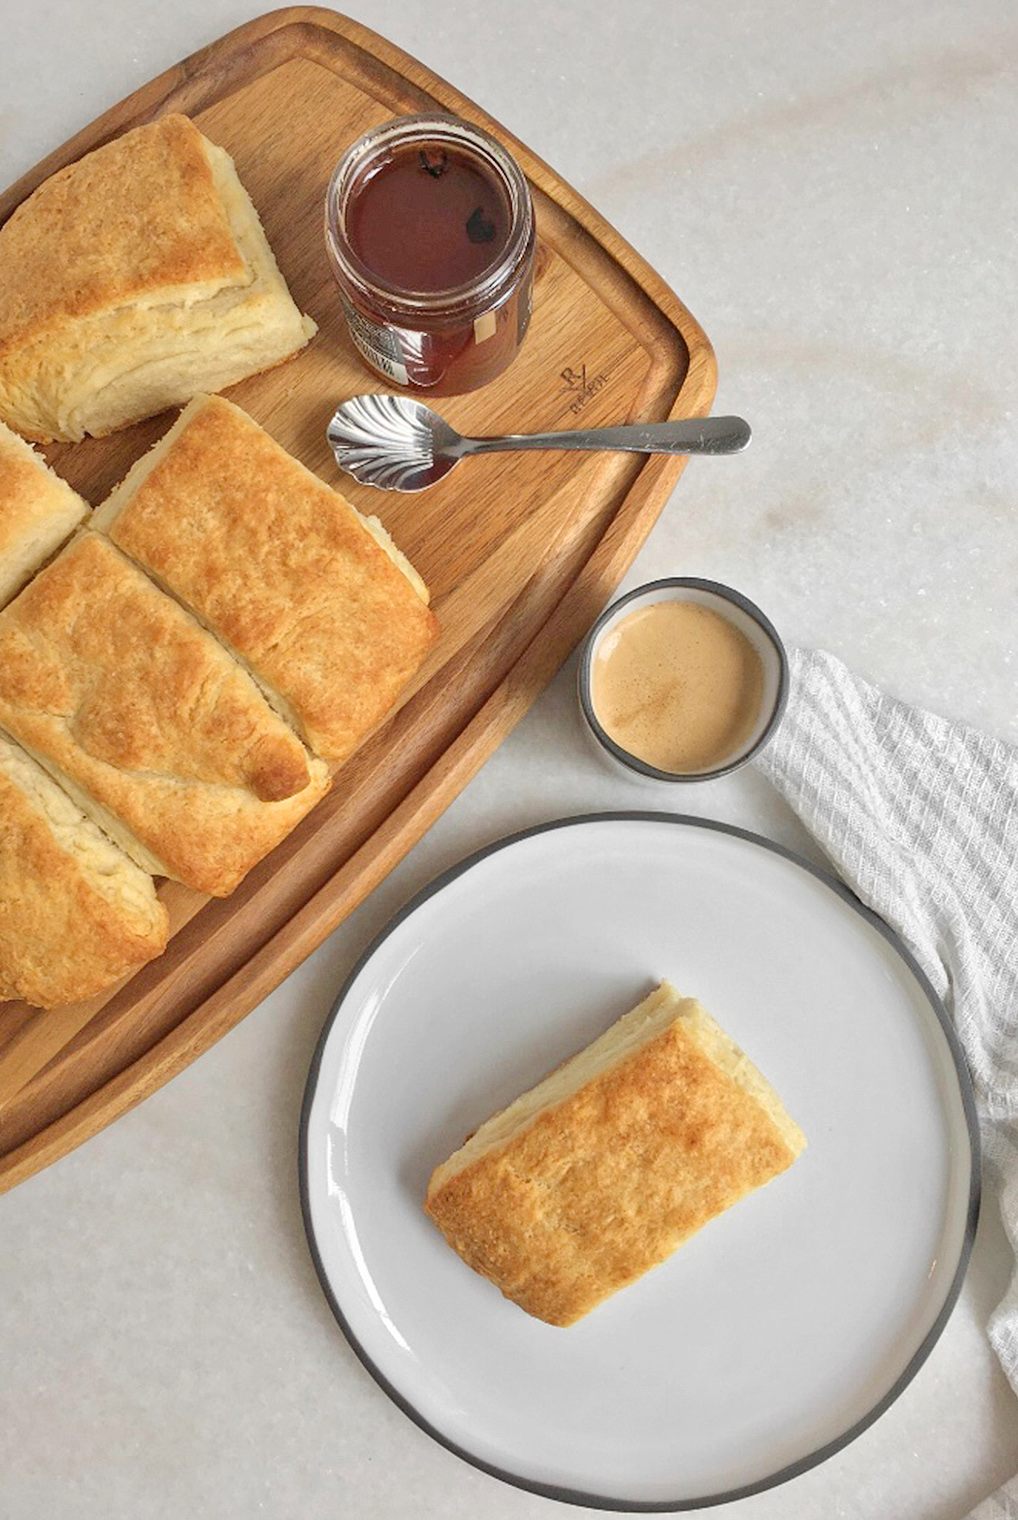
In a mixing bowl combine dry ingredients and mix well with a fork. Add the cubed butter, combine by hand until mixture forms pea-sized crumbles. Add the buttermilk and bacon fat, mixing with a wooden spoon until the dough just holds together. Transfer to a floured surface and roll out to 1” thickness into a rectangle shape. Fold ends in to meet at the middle of the dough, then fold in half from top to bottom. Roll out again into a rectangle and repeat folding two more times, three times in total. This level of folding gives the biscuits a texture that is balanced between crumbly and flaky that holds together enough to work as a sandwich. Less folding gives a more crumbly texture and more folding gives a more structured flaky biscuit. Cut into 8 squares and place onto a non-stick baking sheet, biscuits should be touching. Brush with 2 tablespoons melted butter just before placing in the oven. Bake for about 25 minutes or until golden brown.
Slice biscuits in half, place a piece of chicken on each, drizzle with the pepper honey sauce, add dill pickle slices and serve immediately!
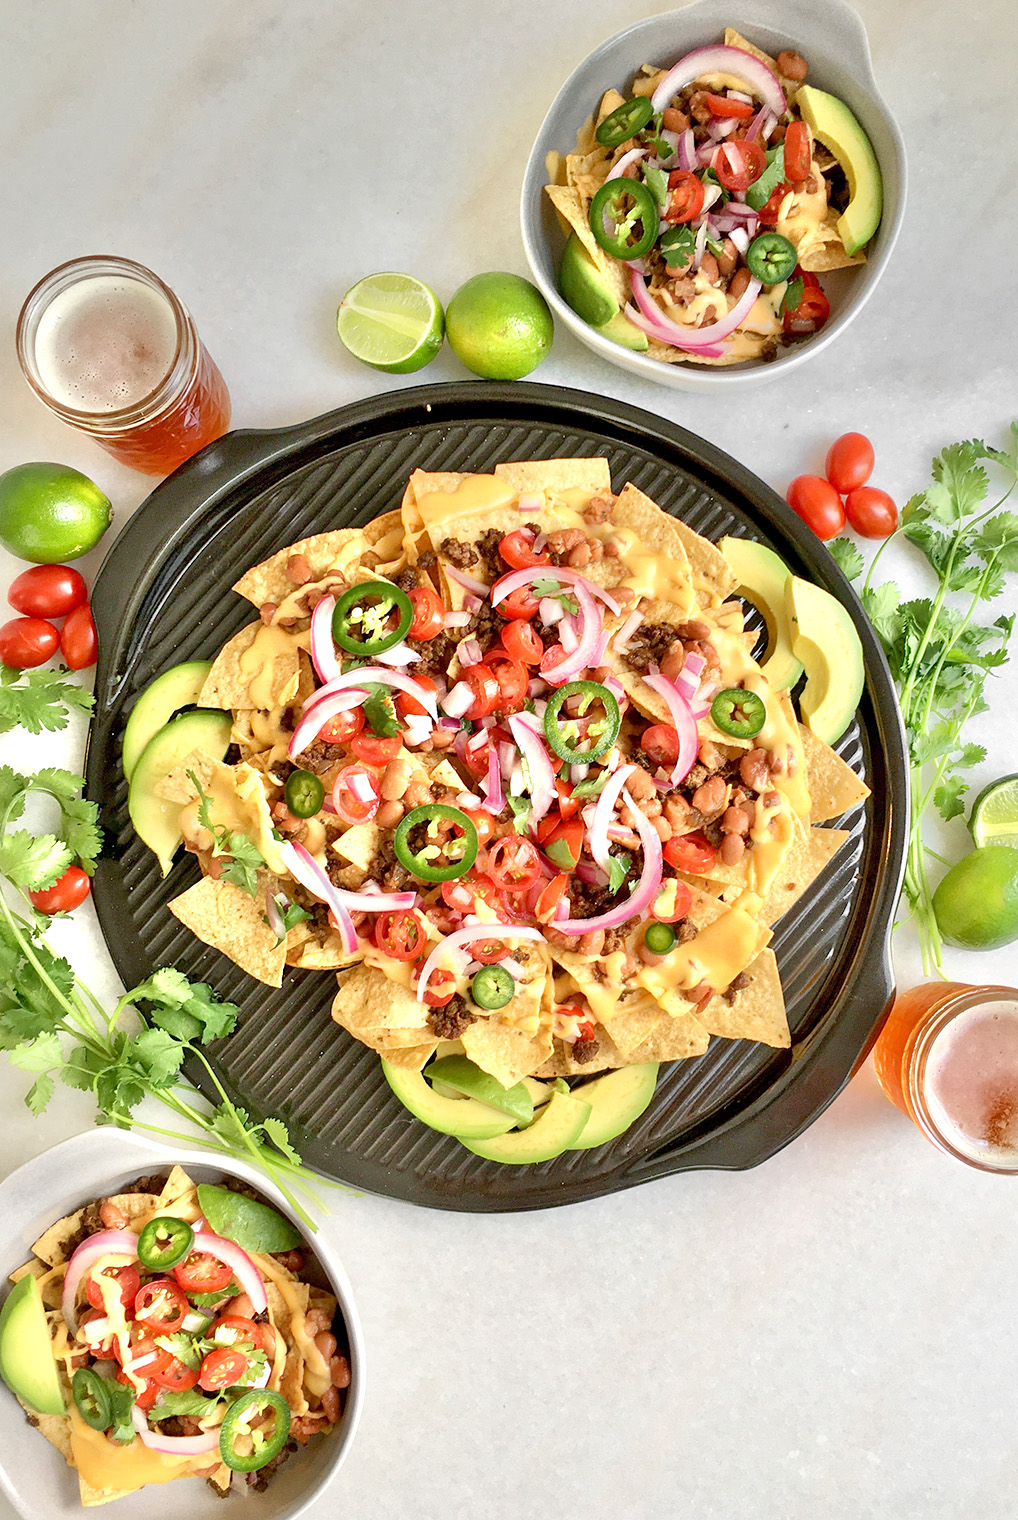
In our house, we really enjoy Mexican flavors and so we tend to make pork carnitas or al pastor, grilled marinated chicken or seasoned ground beef to enjoy throughout the week. I like to incorporate leftovers into breakfast dishes (recipe coming soon!) or even just a pile of nachos for grazing on the sofa while we binge on our favorite Netflix shows. Nachos are such an easy, freestyle dish to prepare but I thought I’d share how we enjoy ours.
Cheese sauce 2 Tbsp butter
2 Tbsp all-purpose flour
2 cups of milk
3 cups shredded cheese ( I used a triple cheddar blend)
Nachos 1 medium tomato, diced
1/2 red onion, diced
1 large bag of tortilla chips
1 14oz. can pinto beans, drained and rinsed
1/2 cup sliced pickled jalapeños (use pickled red onion recipe link substitute onions for jalapeños)
1/2 cup pickled red onions (click for recipe)
1/2 cup chopped cilantro
1 whole ripe avocado, sliced
1 lime juiced and drizzled onto of avocado
Preparation
Taco meat mixture Place the butter in a medium skillet and add the diced red onions. Cook until translucent. Remove onions from the pan and add the ground beef, cook for 20 minutes until browned. Drain excess oil. Add the red onions to the ground beef and all seasonings, and combine. Place lid on the pan and set aside.
Cheese sauce Add two tablespoons of butter to a saucepan over medium heat and continue heating until it becomes frothy, add two tablespoons of flour, and whisk over heat until the mixture starts to turn golden 2-3 minutes. Add the milk gradually by continuing to whisk and continue cooking until the mixture begins to thicken. Remove from heat and whisk in shredded cheese little by little and continue to stir until sauce has a smooth consistency.
Loaded nacho preparation Add a layer of tortilla chips to a large platter or deep pan. Drizzle the cheese sauce over the chips, add the hot taco meat on top, then the heated pinto beans. Add tomato/onion mixture, pickled red onions, and jalapeños. Garnish with sliced ripe avocado and chopped fresh cilantro. Serve immediately!
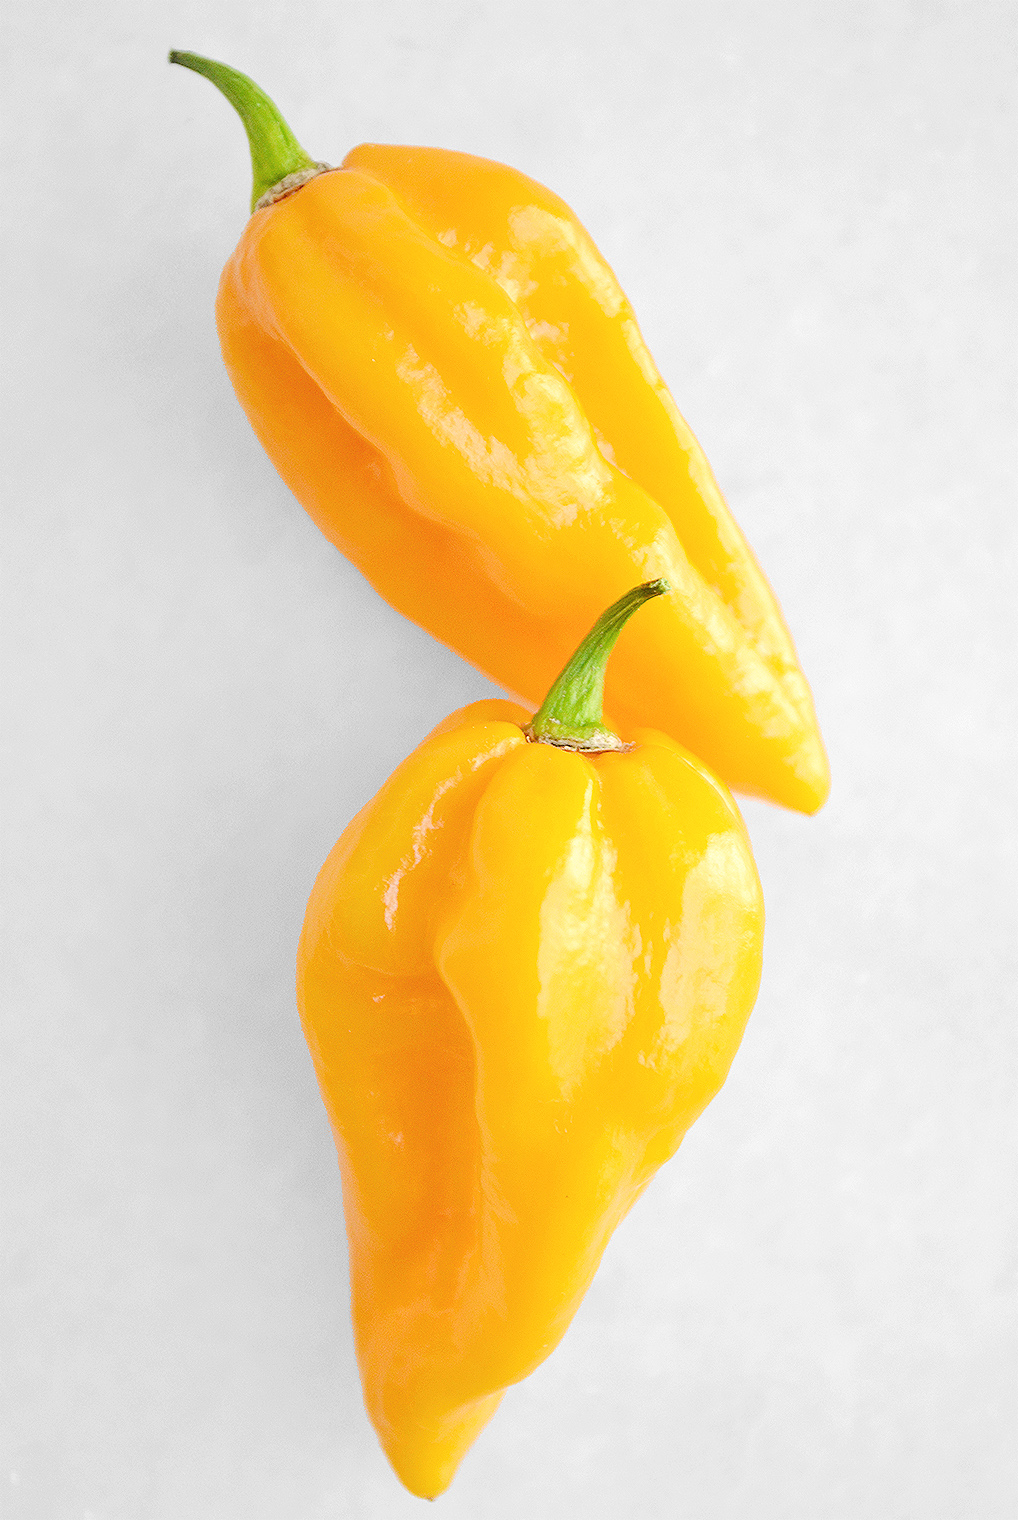
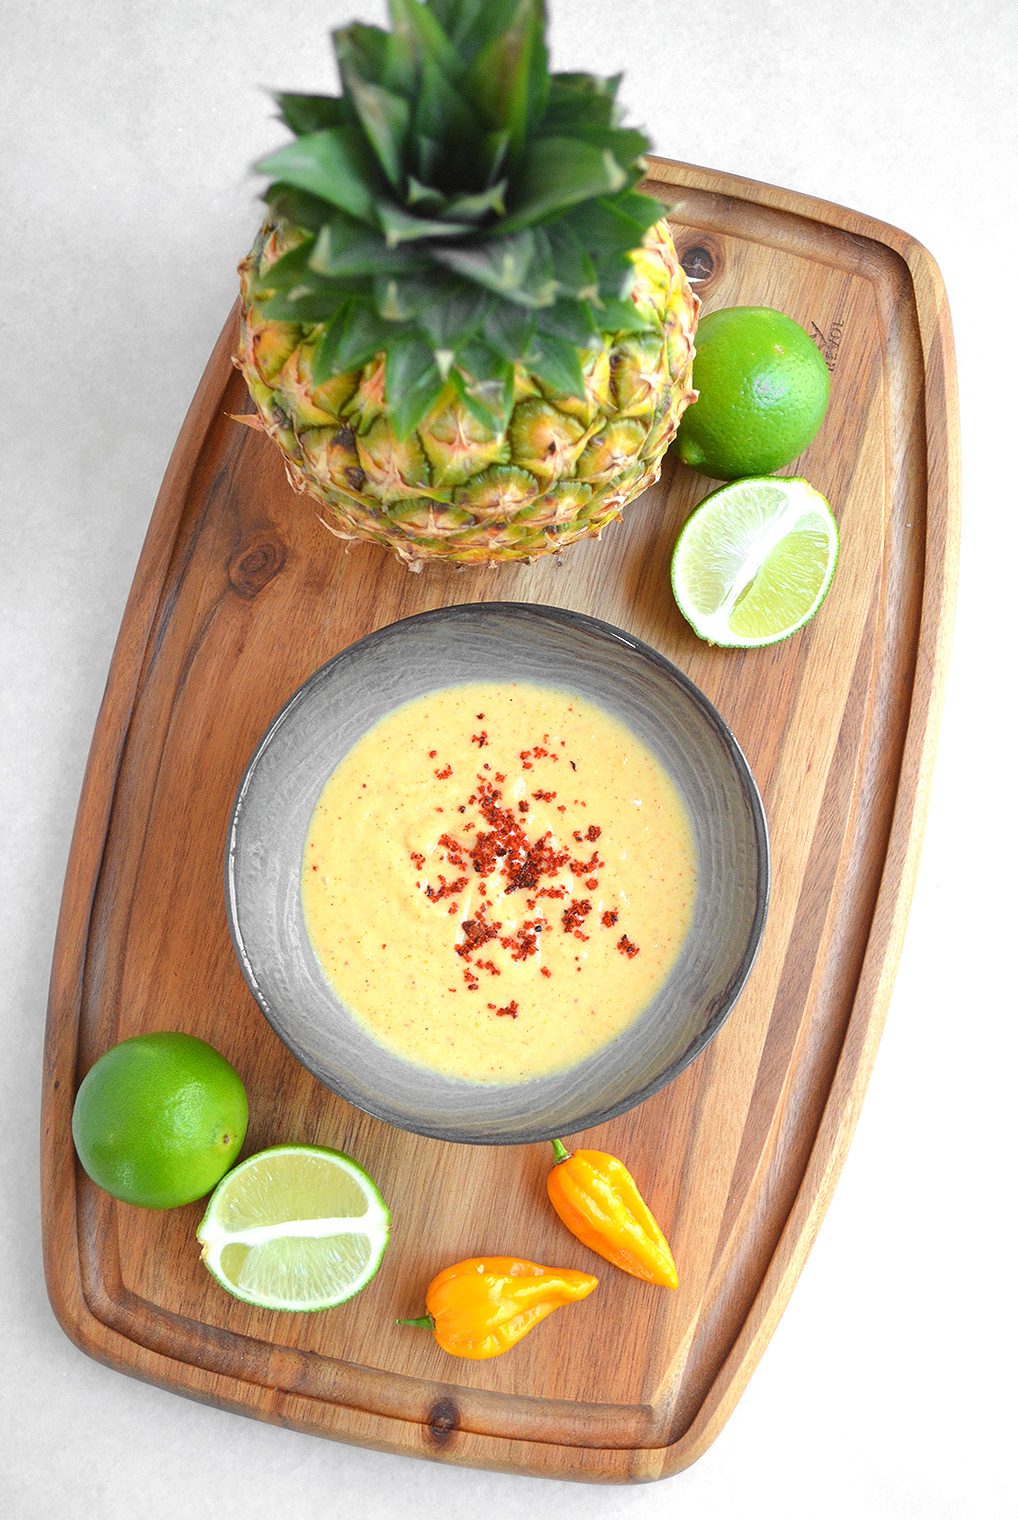
Let’s be honest, we could all use a vacation right now! That’s why I decided to make crispy coconut crusted shrimp with a hot pepper and pineapple dipping sauce, to enjoy a little taste of vacation even while being stuck at home. This dish captures the flavors of a tropical island with sweet coconut, juicy shrimp, and ripe pineapple balanced by a fragrant punch of exotic fatalii peppers. Even though the fatalii pepper is as hot as a habanero, don’t let that scare you. They are also packed with a ton of flavor that tempers the heat, and their fruity, citrusy flavors absolutely pop in this easy pineapple-lime dipping sauce.
Coconut-Panko Shrimp
Ingredients 1-1/2 lbs large shrimp, shelled and deveined
1 cup panko crumbs
1 cup sweetened shredded coconut
1 cup water
2 tsp. Baking powder
2 large eggs, lightly beaten
3 cups flour
1 tsp. salt
1 tsp. black pepper
Vegetable oil
Preparation
If you are using frozen shrimp, be sure to choose ones that are already deveined to save yourself some work. Defrost shrimp in cold water, then de-shell them and pat dry.
Stir together 2 cups of flour, salt, and black pepper in a bowl until combined. In a separate bowl, whisk together the eggs, water, baking powder, and the remaining 1 cup of flour until combined. In a third bowl, stir together the panko crumbs and shredded coconut.
Dredge the shrimp (in batches of five) in the flour mixture, shaking off any excess. Dip into the egg batter and allow the excess to drip off. Dredge in coconut mixture and press down gently on both sides of the shrimp. Make sure they are fully coated. In a large, deep sauté pan or dutch oven, pour vegetable oil 3 inches deep and heat to 350’F. Working in batches of 5, fry the shrimp until golden brown, roughly 3-4 minutes. Place cooked shrimp on a cooling rack above a paper towel-lined cookie sheet and allow to cool for 2 minutes.
Fatalii-Pineapple Sauce
Ingredients 1 cup fresh, ripe pineapple cut into chunks
Juice of one lime
1 tsp. paprika
1 tsp. salt
1/2 tsp. cayenne pepper
1/2 tsp. black pepper
1 fatalii pepper, seeded (you can substitute a habanero pepper)
1 cup mayonnaise
Preparation In a food processor add the first seven ingredients and blend until smooth. Stir together the pineapple mixture and mayonnaise in a bowl until combined. Cover and refrigerate until ready to use.
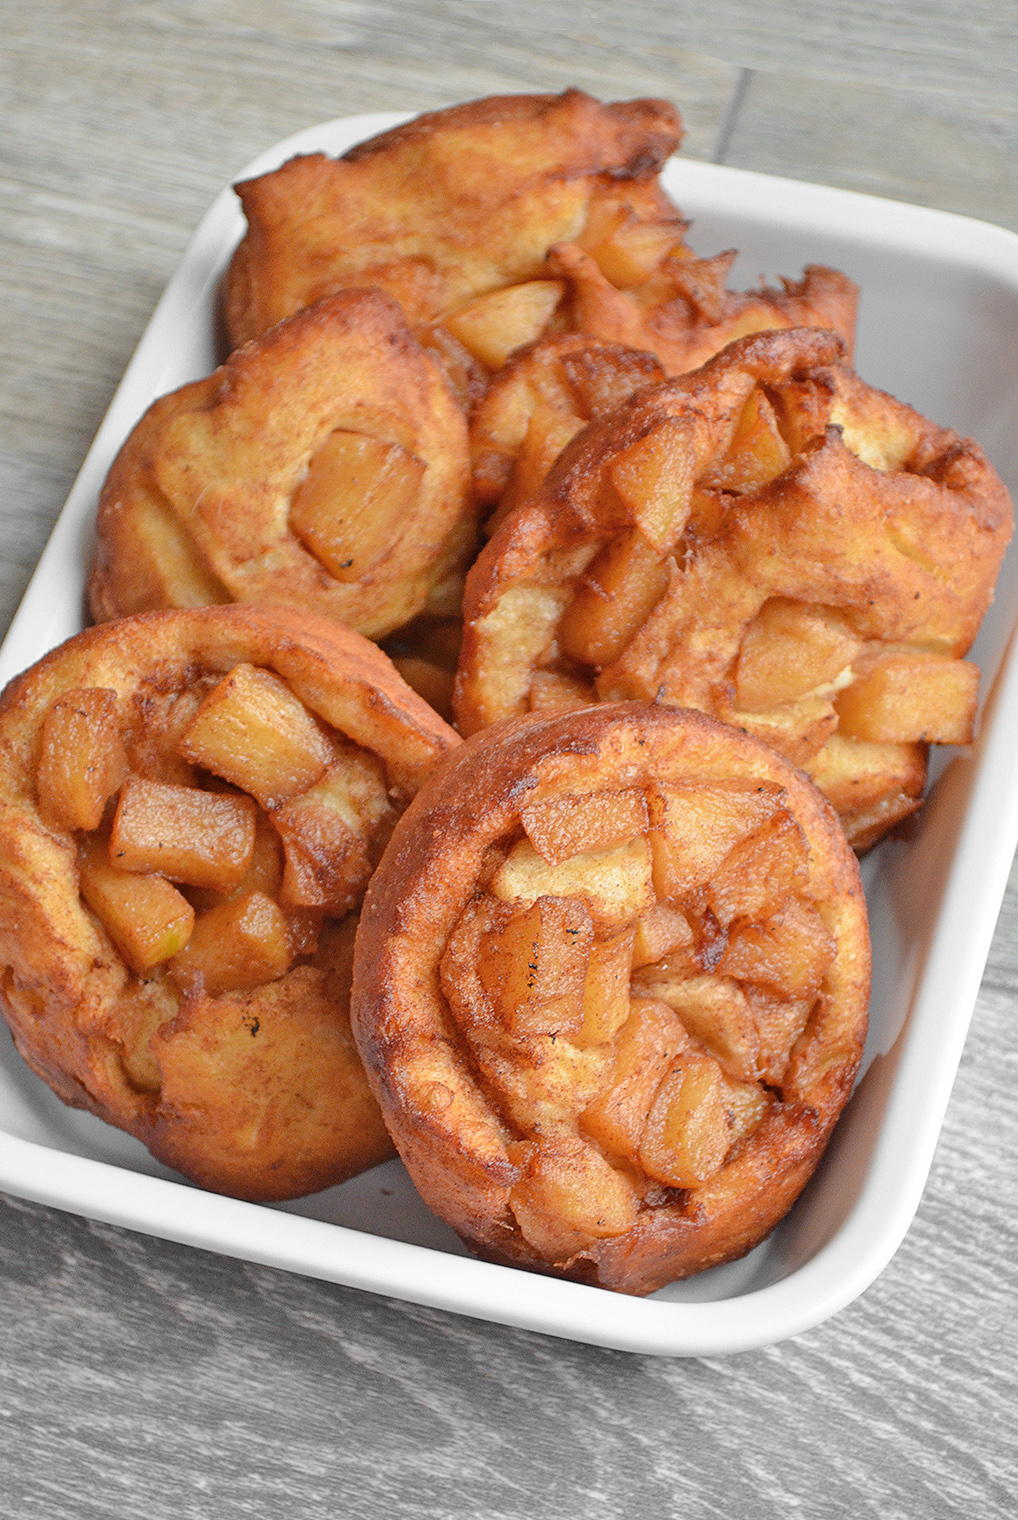
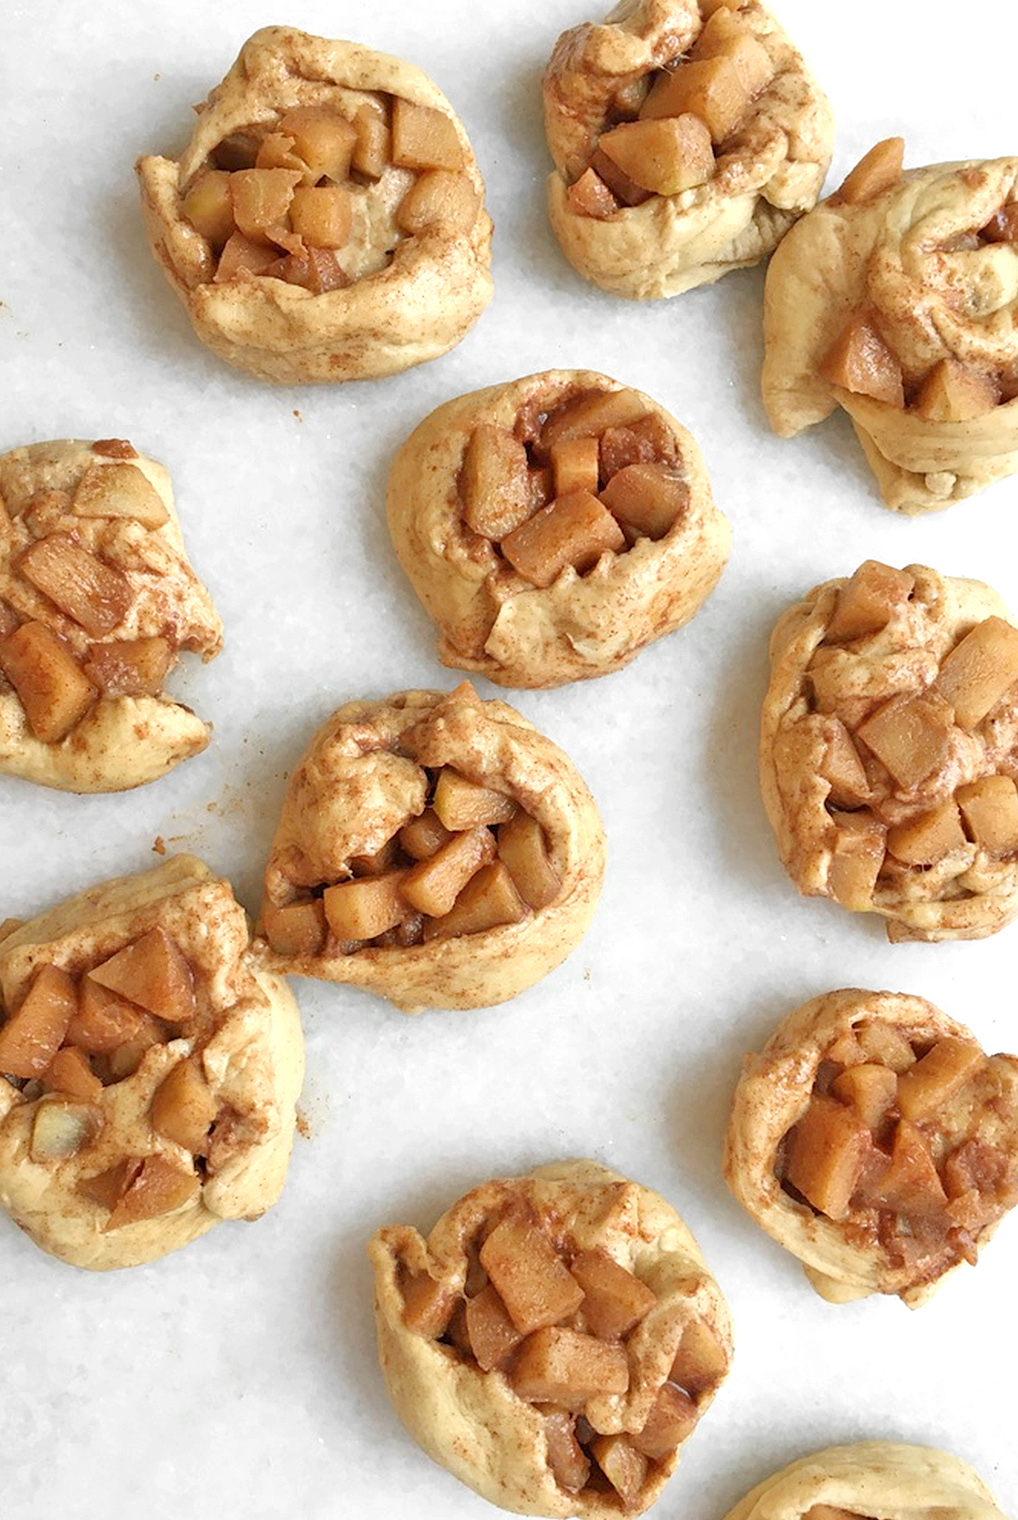
During this challenging time of strict social distancing and the monotonous isolation of being locked up indoors for weeks at a time, I think we all could use a little comfort, and what could be more comforting than warm home-made fried apple fritters? Most of the ingredients you probably already have on hand, other than perhaps the apples. Granny Smith works the best for baking, but different types will work; aim for a mix of tart and sweet apples. This recipe is simple to make, and kids can join in on the fun working with dough and forming the fritters.
Apple Fritters makes 10 medium fritters
Ingredients for the dough 1 pkg. dry baker’s yeast, or substitute with a sourdough starter to extend your supply of yeast
3/4 cup milk, (warmed to 110’F)
1/3 cup sugar
1 t. cinnamon
2 T. unsalted butter, melted
2 eggs
1 t. salt
1 1/2 T. baking powder
3 cups unbleached all-purpose flour
Preparation
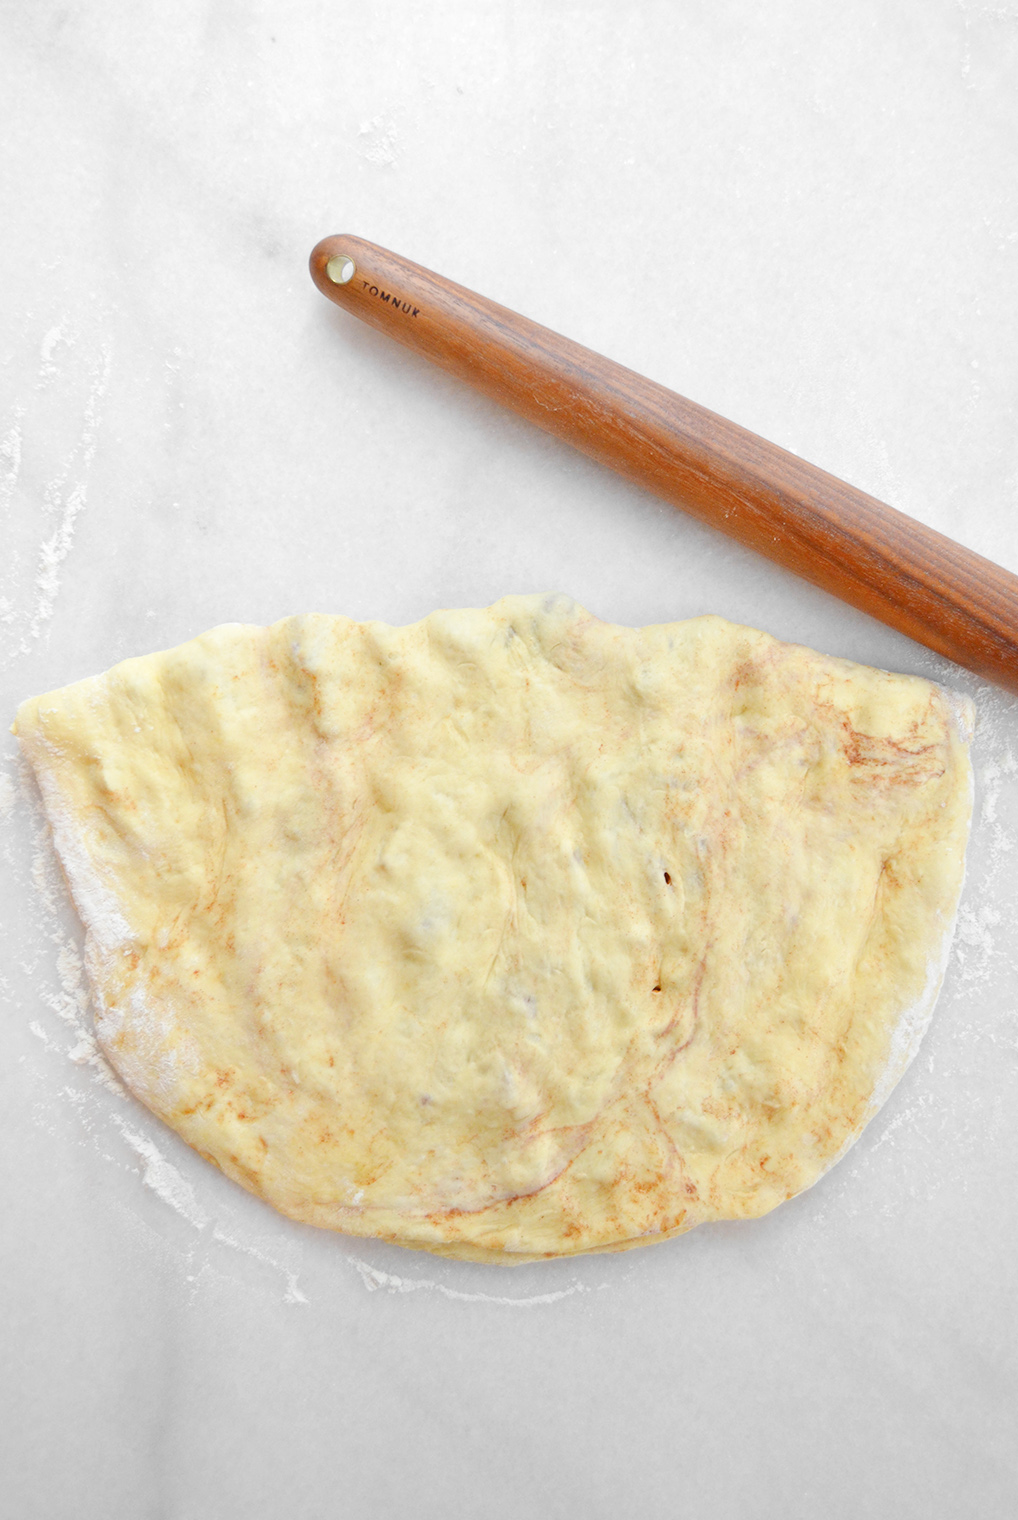
Place the warmed milk in a bowl and add the yeast and sugar. Gently combine and allow the yeast mixture to slightly foam. Once the yeast has proofed, add the cinnamon, salt, melted butter, eggs, baking powder, and flour then combined. Place plastic wrap over the bowl and proof for two hours or until the dough has doubled in size. Once the dough has doubled, scrape the dough onto a clean work surface and roll into a square. Add the apple filling to half of the dough, and add the other half of dough on top of the apple filling. Gently press down on the dough. Using a metal or dough scraper, slice down the middle horizontally, and then slice into vertical cubes. You should have 10 squares. Using your hands, gently pick up a square, fold in half, and press down on the top of the dough. Your apples will be on the top now. Continue with the rest of the squares.
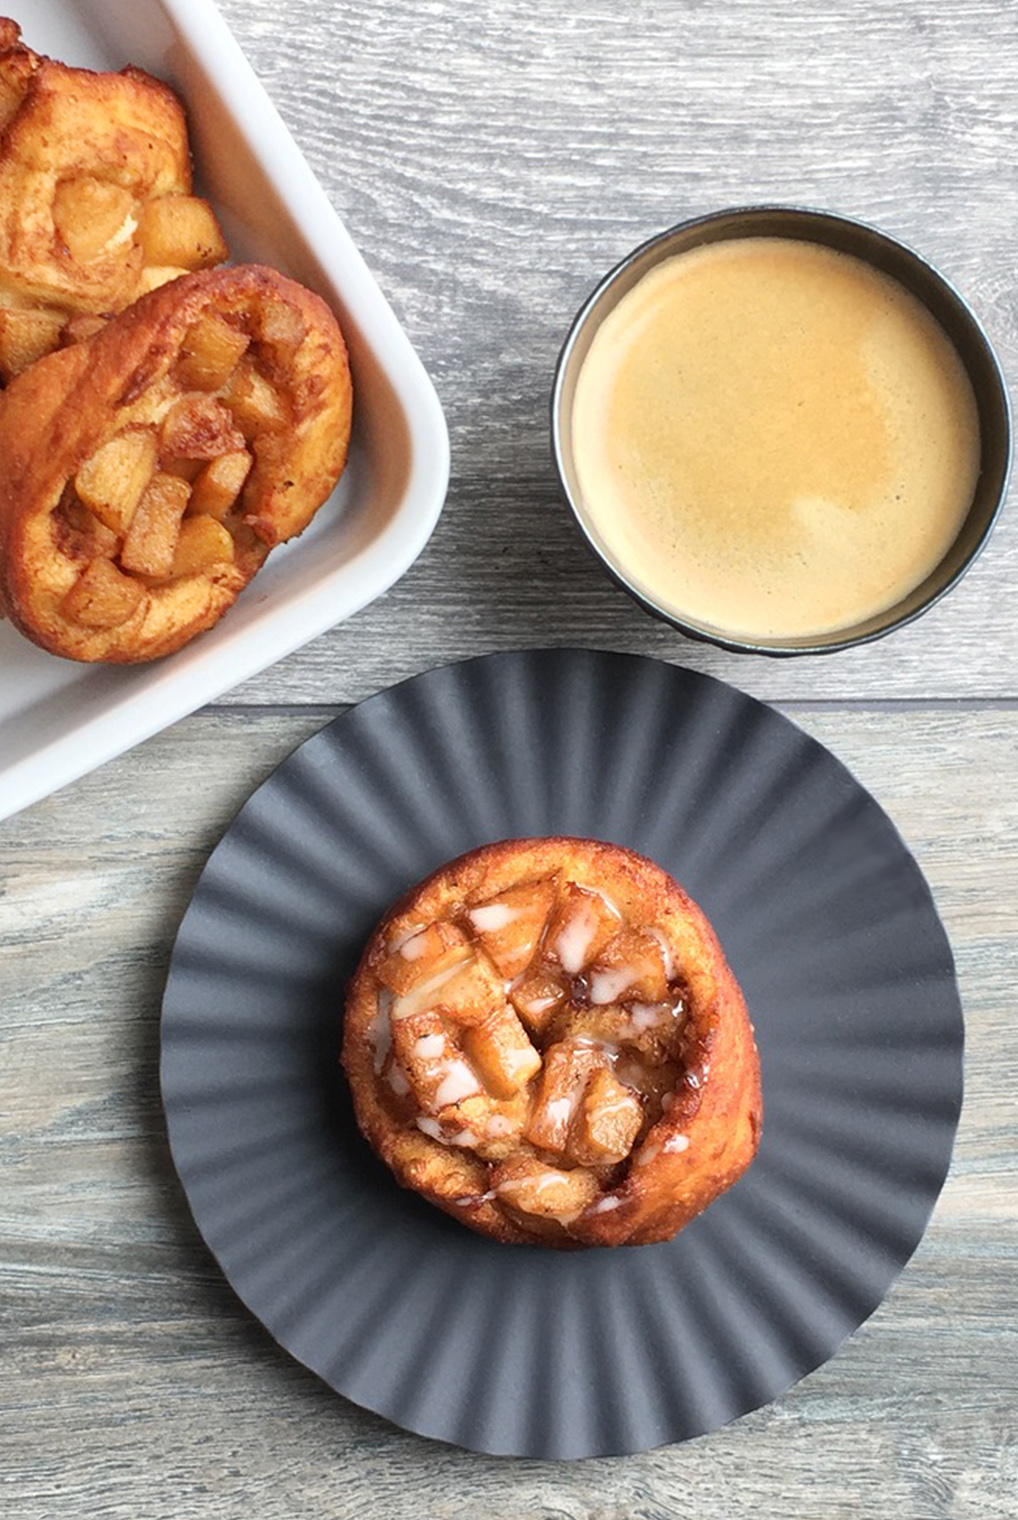
Fill a dutch oven or deep saucepan with vegetable oil (roughly 4 inches). Heat the oil to 350’F. Place paper towels on a baking sheet and add a cooling rack on top. This will allow your fritters to stay crisp yet drain off any excess oil. Gently add two apple fritters to the heated oil with a slotted spoon. Cook the fritters 1-2 minutes per side until they are golden brown. You will lose a few pieces of apples while frying – be sure to remove them to prevent the oil tasting burnt. Continue with the rest of the fritters. Transfer each fritter to the cooling rack. Once the fritters are done, drizzle each of them with a generous spoonful of glaze. Enjoy!
Ingredients for the filling
2 1/2 cups Granny Smith apples (about 4 medium)
1 t. vanilla extract
1 1/2 t. Cinnamon
1 t. Nutmeg
2 T. Unsalted butter
2 1/2 T. Sugar
Preparation
Peel, core, and dice the apples in 1/2 inch cubes. Add the butter to a saucepan, once the butter foams add the apples, cinnamon, nutmeg, sugar, and vanilla extract. Cook, frequently stirring on medium heat until apples become slightly tender, yet still has crunch (10-15 mins). Set aside. *Note* Allow the apples too cool to room temperature before applying them on top of the dough.
Ingredients for the glaze 2 cups powdered sugar
1/3 cup 2% milk
1 t. Vanilla extract
Preparation
Add the powder sugar to a large bowl, and gradually add the milk until the texture is smooth. If you want a thicker glaze, leave out one tablespoon of the milk. Once the glaze is well-combined, add the vanilla extract. Set aside.
*Note* Apple fritters can be reheated in the microwave for 10 seconds or to crisp them up in a 350’F for 7-10 minutes.
Boneless beef short ribs are an inexpensive cut and easy to prepare when braised, and will deliver stunning results. This cut has a beautiful marbling of fat intertwined within the meat, which melts during cooking guaranteeing moist, tender melt-in-your-mouth texture and a rich, flavorful pan sauce. Be sure to choose thick, meaty ribs because they will shrink down while cooking, and I recommend skimming off some of the fat that will render out.
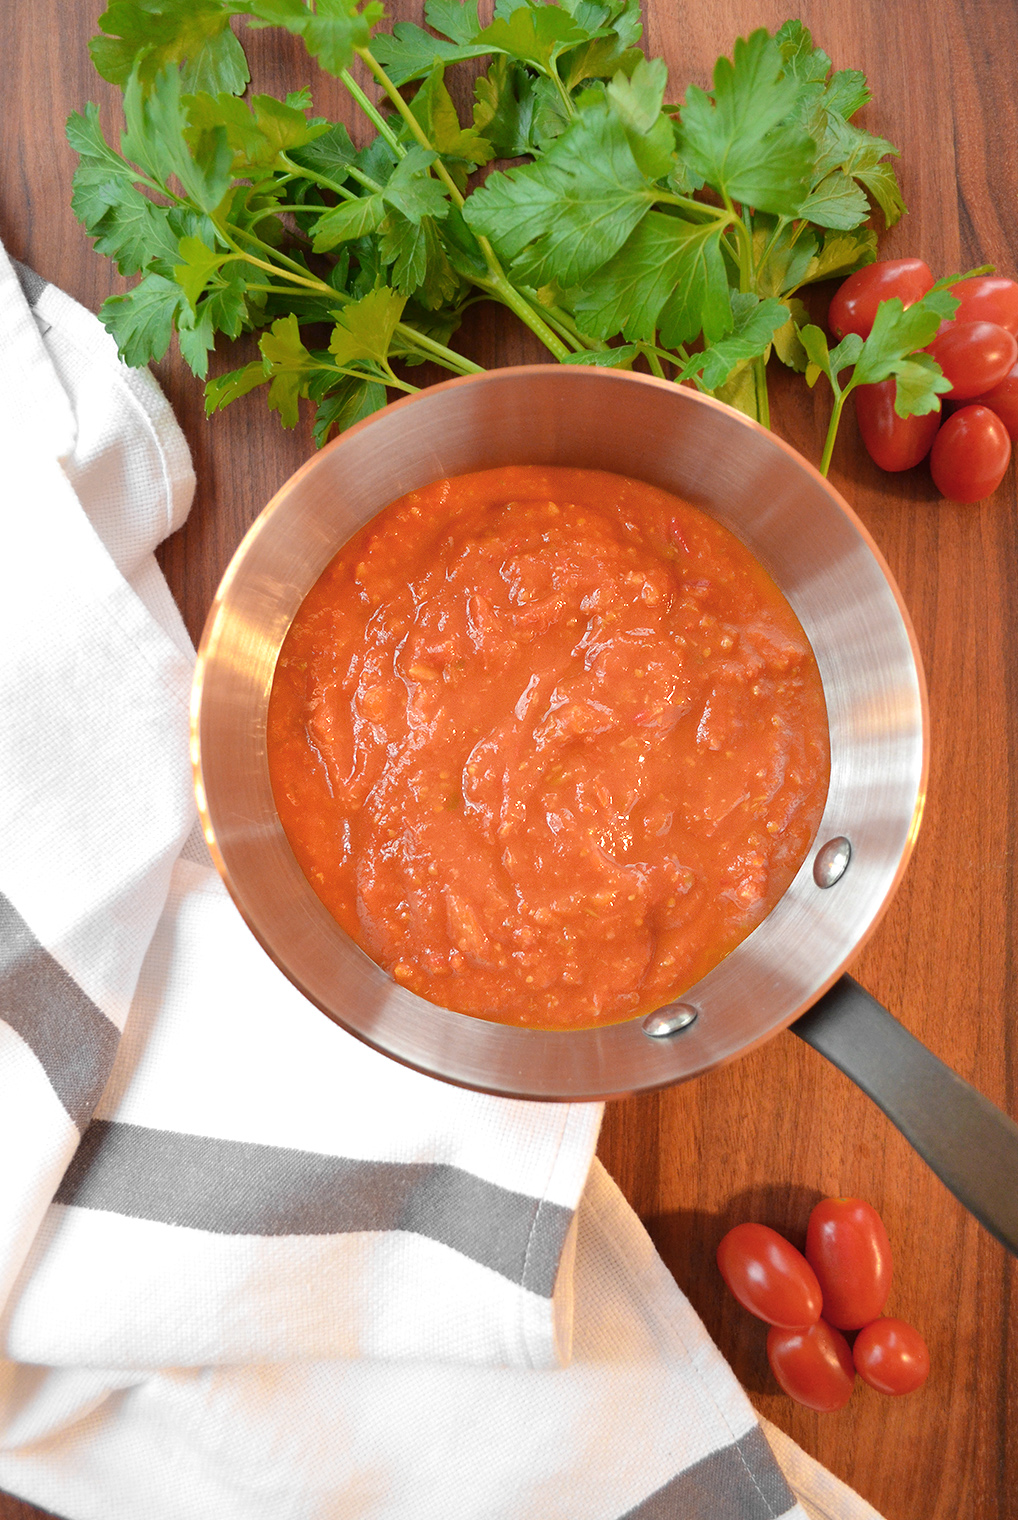
In this recipe, I’ve braised my short ribs in a cabernet wine with fresh herbs, and of course, the holy trinity of carrots, celery, and onions. I like to top my ribs with a piquillo pepper tomato sauce that’s something like a Romesco minus the almonds. The combination of sweet tomatoes and peppers with a touch of spicy heat pairs wonderfully with the cabernet-braised beef. Spoon the sauce liberally on top of the short ribs just before serving.
Red Wine Braised Boneless Short Ribs with Piquillo Tomato Sauce
Ingredients 2 lbs. (6-8) boneless beef short ribs
4 carrots, diced
3 celery ribs, diced
2 medium yellow onions, finely diced
6 garlic cloves, minced
2 heaping tablespoons Better than Bouillon roasted beef base, dissolved in
5 cups hot water
2 tablespoons tomato paste
2 cups cabernet red wine
2-3 bay leaves
4 sprigs fresh thyme
7 springs fresh parsley (stems/leaves)
3 tablespoons unsalted butter
1/4 cup vegetable oil, for browning ribs
Flour to dredge the beef
Freshly cracked black pepper
Preparation
Preheat the oven to 300’F
Heat a large cast-iron dutch oven or large, lidded pan over medium-high heat. While the pan is heating, pepper ribs liberally before dredging in flour. When the pan is hot, add oil to the pan and when it starts to shimmer, add ribs a few at a time, turning to brown on all sides. After the meat has been seared, transfer to a plate. Add butter to the pan along with onions, carrots, and celery. Cook on medium heat until onions begin to brown.Add garlic and cook for two minutes, then add tomato paste, wine, and beef stock while stirring to combine. Add fresh thyme, parsley, and bay leaves. Return the ribs to the pot and cover, place in preheated oven and braise until beef becomes tender about three hours. Remove pot from oven and skim the fat before serving. Plat ribs on a bed of mashed potatoes and top with a generous streak of piquillo sauce.
Piquillo Tomato Sauce
Ingredients 1-pint grape or cherry tomatoes
8 piquillo peppers, thinly sliced, from a jar or the olive bar (these are brined in vinegar).
*If you can’t find piquillo peppers, you can use a 12oz jar of roasted red peppers in water, drained.)
1 tablespoon capers, drained
7 large green olives, thinly sliced
2 cloves garlic, minced
1 tablespoon olive oil
1/4 cup cabernet wine
1 small shallot, minced
1/4 teaspoon Aleppo dried pepper flakes (red chili flakes will work as well)
Preparation
Heat a saucepan on medium and add the olive oil. Add the shallots and cook until translucent. Add the peppers, capers, olives, garlic, and tomatoes to the pot, simmer for 15 minutes until tomatoes break down. Add red wine and pepper flakes, stirring to combine. Simmer an additional 10 minutes. Serve on top of the short ribs.
Living in the midwest, a full 800 miles from the nearest ocean, our seafood choices are still pretty decent though typically it has been a while since your dinner was pulled from the sea and has passed through a few hands, each of whom layer on additional markup. This doesn’t only result in higher prices for the consumer, but it also eats into the share that finds its way to the fishermen who caught it.
Sitka Salmon Shares is a subscription seafood delivery service which was founded in 2011 with a deep understanding of the importance of sustainable fishing, an appreciation for the families who harvest the fish, and the incomparable qualities of wild-caught Alaskan salmon. For more info on the service, scroll down to the section About Sitka Salmon Shares at the end of this post or visit them online at SitkaSalmonShares.com.
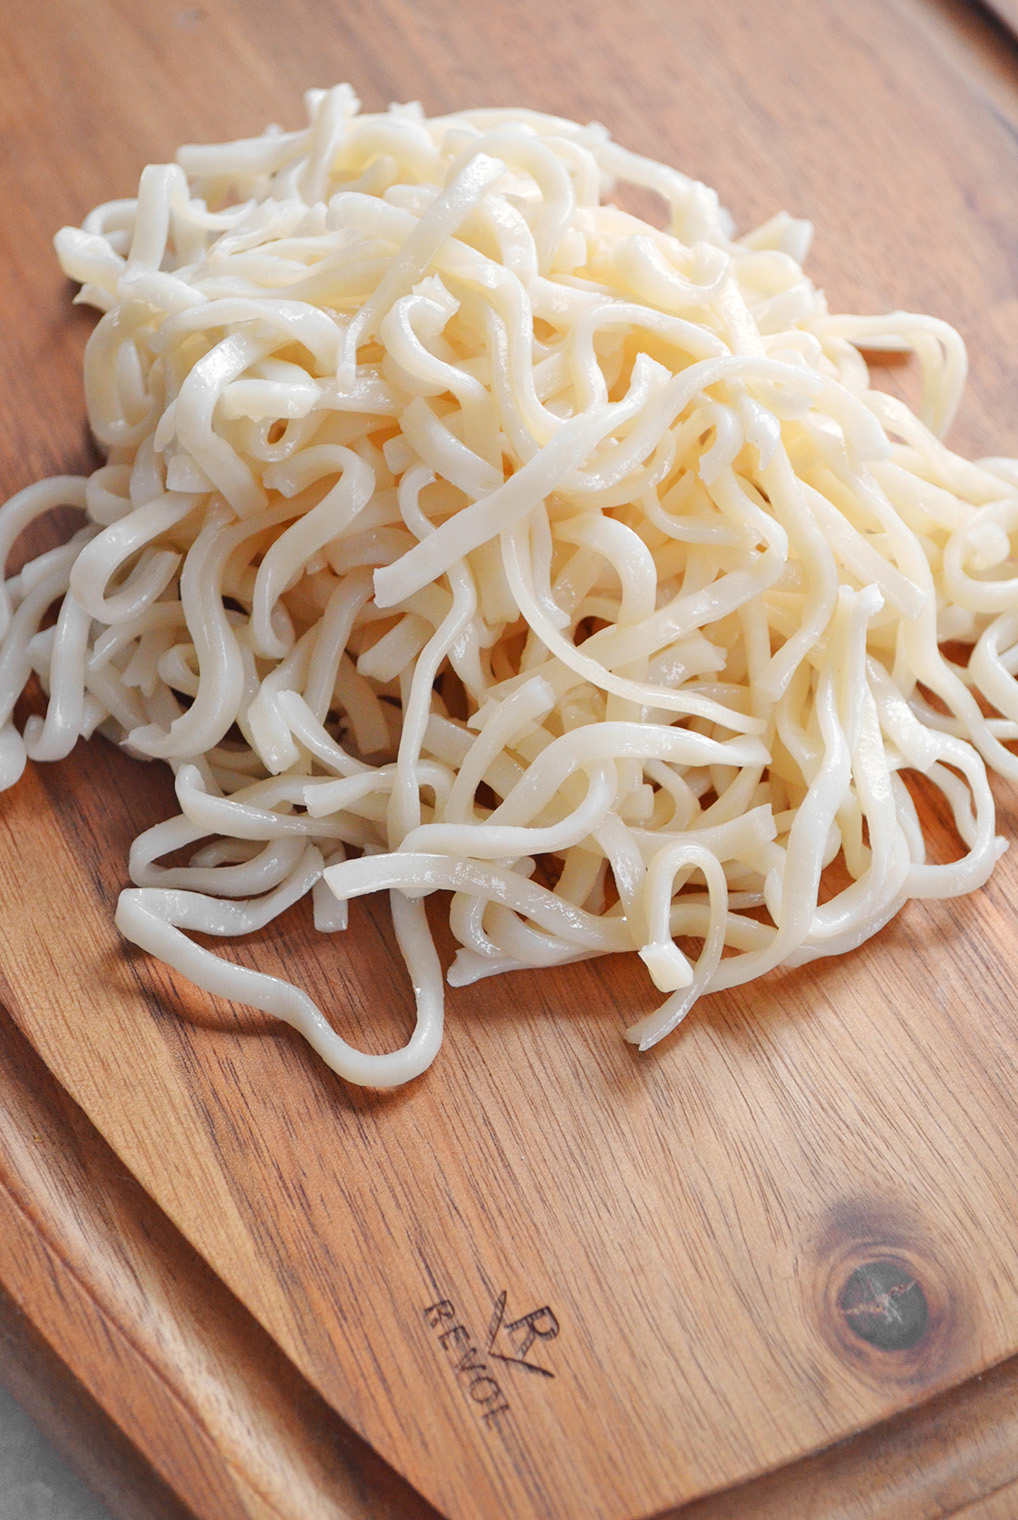
As I open the insulated shipping box, each fillet is individually vacuumed sealed to protect its freshness and natural color. I decided to pan sear this first piece with a Thai chili glaze, and serve it alongside rice noodles dressed in sesame oil and sunomono, Japanese cucumber salad. I usually sear salmon in ~4 oz. portions, but since this was such a gorgeous piece of fish, I decided to sear it whole and carefully slice it after cooking. This will create a contrast between the seared and glazed exterior and highlight the vibrant interior.
I start preparation by slicing all produce and measuring out additional components so that while the salmon is searing, I can easily cook and assemble the two side dishes. After prep is complete and before I heat my skillet, I carefully debone the fillet by gently feeling along its surface to locate the ends of the pin bones, then removing them with a pair of kitchen tweezers.
Pan-seared Coho Salmon 12oz whole or three 4oz. fillets of salmon
2 tablespoon vegetable oil
1 teaspoon salt
3 tablespoons Thai chili sauce
Freshly cracked pepper for finishing, as it will burn and smoke if used during searing.
Pat the fillet dry with paper towels and season lightly on both sides with sea salt. Heat oil in a large skillet over medium heat until it starts to shimmer. Place the salmon skin-side down in the pan and cook for 4-6 minutes per side until just cooked through. If it sticks at first, let it cook a bit longer until it releases on its own. This will avoid pulling off the skin and shredding the flesh. Remove fillet from pan to a warmed plate and cover with foil. Prepare each plate with a heap of sesame noodles and a pinch of sesame seeds, then place a portion of salmon on top and garnish plate with cucumber salad.
Sesame Rice Noodles 1 pkg rice noodles
2 stalks of celery, thinly sliced
3 scallions, thinly sliced
1 small bok choy, thinly sliced
1 small orange pepper, cored, and thinly sliced
For the sesame sauce:
2 small cloves of garlic, minced
2 tablespoons of low sodium soy sauce
1 tablespoon rice wine vinegar
2 teaspoons honey
1 1/2 teaspoon sesame oil
1 teaspoon sesame seeds
1 teaspoon sriracha sauce
1 teaspoon red pepper flakes
Mix all ingredients for the sesame sauce together and set aside. Microwave rice noodles for one minute, combine noodles and vegetables in a bowl, and stir in the sauce to combine. Serve warm or cold.
Cucumber salad (Sunomono) 1 English cucumber, thinly sliced
2 small cloves of garlic, minced
1 tablespoon of rice wine vinegar
1 tablespoon of low sodium soy sauce
1 1/2 teaspoon of sugar
1/2 teaspoon sesame oil
1 teaspoon chili flakes (optional)
1 teaspoon sesame seeds
Thinly slice cucumber and place aside in a medium bowl. In a small bowl, combine garlic, rice vinegar, soy sauce, sugar, and sesame oil and mix thoroughly with a fork. Immediately before serving, add the dressing to the cucumbers and stir to combine. If you dress the cucumber too early, the salt will draw all of their water out, spoiling its crisp texture and diluting the dressing.
About Sitka Salmon Shares: Sitka Salmon began in 2011, when a Midwestern college professor, Nic, and his two students traveled to Sitka, Alaska, for the summer. There, they engaged in conversations that deepened their understanding of the importance of protecting Southeast Alaska’s wild salmon populations and the pristine environment that supports one of the world’s last great salmon reserves. They returned to the Midwest with boxes of line-caught, wild Alaskan salmon, harvested by their fisher friends in Sitka. While in Alaska, this band of merry Midwesterners met Marsh. Marsh was the self-styled foodie and passionate gourmand of Sitka’s hook-and-line salmon fleet. A local legend on the Sitka dinner party circuit, Marsh’s favorite pastime included sourcing ingredients from the wilds of Southeast Alaska and elevating them with techniques learned from stints in professional kitchens. As you might suspect, Marsh’s quest for perfect food spilled into his work as a commercial fisherman. He obsessively handled his fish every step of the way to guarantee that eaters on the other end of his line enjoyed the perfection he sought in his kitchen—including his family down in the proud town of Green Bay, Wisconsin. With a lot of passion and even more luck, Sitka Salmon Shares was born.
Sitka Salmon Shares is now a completely integrated boat-to-doorstep seafood company. They have a friendly group of fishermen-owners who deliver their fish. They have a small processing plant in Sitka, Alaska, where they custom-process their catch with a focus on quality and traceability. Once a fisherman’s harvest is delivered on ice to the plant, it must be processed swiftly to preserve the fresh, delicate taste and texture of premium seafood. There is no time wasted. The cutting line is the next stop at the plant – the fish must be preciously filleted, so no meat is wasted. Next, all fish are vacuum sealed, and then in the blast freezer. Did you know the average piece of “fresh” fish in the Midwest has been out of the water for around two weeks? This is why they prefer to freeze their fish as soon as possible rather than let their harvest sit on the boat, or on ice, for extended periods of time. The blast freezer pods hold at -45 – -50’F, racks of fresh fillets are spaced evenly on trays and blasted with circulating air, causing a wind-chill effect that rapidly freezes fish. This blast-freeze maintains the fish’s cell structure by preventing ice crystals from forming. This is why if you freeze it fast enough, and keep it frozen, you’ll have yourself a piece of fish preserved like the moment it was pulled from the water. Also, they have two Good-Fish Hubs in the Midwest (one in Illinois and the other in Wisconsin), which allow them to deliver their fishermen’s catch directly to your doorstep (or to your local farmers market or restaurant).
And on a final note, I love that every box includes the names of the fishermen who caught it. To me, it makes the whole experience that much more special to know who caught the fish on my plate.